Blog

  • Heatless Curls: How to Get Damage-Free Overnight Waves

    📌 At a Glance (Key Takeaways)

    • Dramatically eliminates heat damage, split ends, and moisture depletion caused by curling irons.
    • Requires hair to be approximately 80–85% dry for curls to set effectively overnight.
    • Satin and silk curling rods preserve hydration and eliminate morning frizz.
    • Results frequently last 48 to 72 hours with proper morning texturizing spray application.

    Wrap barely-damp hair around something soft, sleep on it, and unwrap waves in the morning. That is the whole idea behind heatless curls, and once you understand why it works, every method below becomes a variation on the same simple trick.

    Your hair holds its shape through two kinds of bonds. Disulfide bonds are the permanent ones that decide whether your hair grows straight, wavy, or coily, and nothing short of a perm changes them. Hydrogen bonds are the temporary ones, and they break every time your hair gets wet and reset as it dries. Curl a wet strand around a rod, let it dry in that curved position, and the hydrogen bonds lock into the curve. No heat, no cuticle damage, no vaporized moisture. That is also why a curling iron gives you a curl in thirty seconds and why it costs your hair so much to do it that way.

    The methods worth knowing

    There are dozens of gadgets, but they break down into four approaches, and the right one depends mostly on your length and the curl you’re after.

    The satin curling ribbon is the one you have seen all over social media: a long, foam-filled rod wrapped in satin that sits across your crown like a headband. You wrap sections back and away from your face in a braid-like pattern down each side and tie off the ends. Satin barely grips the hair, so there is almost no friction, and the result is a smooth, uniform blowout wave. It is the best pick for medium to long hair.

    No rod on hand? A plush robe belt does nearly the same job. The diameter is close to ideal for a relaxed curl, and the terry or fleece fabric wicks a little residual moisture as you sleep. The waves come out looser and more casual, which some people prefer.

    For shorter hair, bobs, and anyone who wants tighter spirals, flexi-rods win. Because each rod is separate and bendable, you control the tightness by choosing how small a section to wrap and how narrow a rod to use. Wrap half-inch sections vertically for ringlets. This is the only method on the list that genuinely suits shoulder-length hair and bobs.

    The gentlest option is two satin-scrunchie top knots. Split your hair down the middle, twist each half loosely into a bun near the crown, and secure with jumbo scrunchies. You wake up with soft, lived-in S-waves and, crucially, nothing rigid pressing on your head, so restless sleepers actually get through the night.

    How to get it right with the satin ribbon

    This is the method most people ask about, and most people fail it for the same reason: they wrap soaking-wet hair. It will not dry overnight, and you will wake up to damp, limp strands. Get your hair to about 85 percent dry first, cool and barely damp to the touch.

    1. Work a small amount of lightweight styling foam or a leave-in curl cream through the mid-lengths and ends. This gives the hydrogen bonds something to set around.
    2. Center the rod across the top of your head and clip it at the crown so it doesn’t slide while you work.
    3. Starting at your hairline, wrap a one-inch section over and around the rod. As you come back around, pick up a new section, the way you would a French braid, and keep going to the ends.
    4. Tie off each side with a satin scrunchie. Fold the tails up for comfort, or cross them behind your neck and pin.
    5. In the morning, untie, pull the rod straight up and out, and rake through with your fingers. Do not attack it with a fine-tooth comb, that is how you turn waves into frizz.

    Which method for which hair

    Method Wave style Best length Prep time Overnight comfort Hold
    Satin ribbon rod Bouncy blowout waves Medium to long 5 min Very good 2-3 days
    Plush robe belt Loose glamour curls Long 5 min Excellent 1-2 days
    Flexi-rods Defined spiral ringlets Short to medium 10-12 min Moderate 3-4 days
    Scrunchie buns Lived-in beach waves Any 3 min Excellent 1-2 days

    A few things make or break the result regardless of method. Sleep on silk or satin, because a cotton pillowcase ruffles the cuticle and works your wraps loose. Keep the tension snug from the very first turn at your temple, since loose roots give you flat tops and curl only at the ends. Finish with a light mist of dry texture spray rather than a stiff, alcohol-heavy hairspray so the waves still move. And always wrap away from your face; it opens up your features and mirrors the way a stylist would set a blowout.

    If your waves fall flat by afternoon, the usual culprit is humidity swelling the cuticle. A light anti-humidity spray on damp hair before you start helps them hold. In dry winter air the opposite happens, static and flyaways, and a weekly mid-lengths-to-ends oil mask settles that down.

    Frequently Asked Questions

    Can I do heatless curls on completely dry hair?

    Yes! If your hair is dry, lightly mist it with water from a continuous spray bottle or apply a light leave-in conditioning spray before wrapping to reset the hydrogen bonds.

    Why did my heatless curls fall flat after an hour?

    This usually occurs when hair was either too wet when wrapped (didn’t dry completely) or lacked a light setting foam or mousse to provide structural memory.

    Can heatless curls work on layered cuts and curtain bangs?

    Yes. Wrap shorter layers and curtain bangs on the very top of the rod, or wrap bangs around a separate mini velcro roller on top of your forehead for focused framing lift.

    Are heatless curls comfortable to sleep in?

    Satin ribbon rods and plush robe belts are filled with soft foam or cotton batting, making them very comfortable for side and back sleepers.

    Additional Details

    • Description: Wake up to salon-worthy curls without frying your hair. Learn the best overnight heatless wrapping methods for bouncy, healthy waves.
    • Published: 2026-07-18T00:00:00.000Z
    • Updated: 2026-09-07T00:00:00.000Z

    Images

    • https://womensgo.com/articles/heatless-curls-inline1.png
    • https://womensgo.com/articles/heatless-curls-inline2.png

  • Calm Morning Routine: 6 Steps to a Productive Day

    Calm Morning Routine: 6 Steps to a Productive Day

    The kettle is starting to tick. There’s a square of pale light on the kitchen floor, the house is still half-asleep, and for a few minutes nobody needs anything from you. That’s the feeling a calm morning is built around — not a five-step optimization plan, just a small pocket of quiet that belongs to you before the day gets loud.

    Most of us don’t lose that pocket because we’re lazy. We lose it because the very first thing we do is reach for the phone, and the moment the screen lights up, the morning stops being ours. Someone else’s news, someone else’s group chat, someone else’s beautifully lit breakfast — all of it pouring in before we’ve even had a glass of water.

    A calmer morning is mostly about protecting those first minutes, and about doing a little of the work the night before so the morning-you has fewer decisions to make.

    Start the night before

    This is the part nobody tells you: a good morning is usually assembled at about 9pm. Not with a rigid checklist, just a couple of small kindnesses to your future self.

    Lay tomorrow’s clothes over the chair. Set the coffee up so all you have to do is press a button. Move your phone charger off the nightstand and into the hallway or kitchen. That last one sounds fussy, but it changes everything — if the phone isn’t within arm’s reach, you can’t doom-scroll before your eyes are properly open, and you’re far more likely to actually get up.

    If your mornings feel permanently frantic, try nudging your alarm fifteen minutes earlier for a week. Not to cram more in. Just to give yourself a buffer, so a dropped spoon or a slow toddler doesn’t tip the whole morning into a scramble.

    Water before coffee

    You’ve been asleep for the better part of eight hours without a sip of anything, so you wake up a little dehydrated, and dehydration does a very good impression of tiredness. Before the coffee, drink a proper glass of water. Keep it by the kettle so it’s the first thing your hand finds. It’s a tiny thing that takes the fuzzy edge off the first half hour, and it costs you nothing.

    Then have your coffee or tea — and here’s the only real ask — have it without the phone in your other hand. Just the cup. Notice it’s warm. Look out the window. It feels almost silly written down, but a single slow drink at the start of the day is one of the most reliably calming things I know.

    Let your body wake up too

    You don’t owe anyone a workout at 6am. When people picture a “morning routine” they imagine forty-five sweaty minutes, decide they can’t face it, and skip the whole idea. But movement in the morning isn’t about fitness goals. It’s a signal — a gentle nudge that tells your body the day has started.

    Five minutes is plenty. Pick whatever you’ll actually do:

    • A few slow stretches on the rug, cat-cow, a forward fold
    • Stepping outside for a couple of minutes — the daylight genuinely helps you feel awake, and helps you sleep better that night
    • Dancing around the kitchen to one song while the coffee brews
    • A quick loop around the block if you have a dog, or just legs that want moving

    If it makes you feel a fraction more awake and a little more like yourself, it’s done its job.

    A few written lines, if you like

    This one’s optional, and I’d never pretend it’s magic. But before the inbox opens, some people find it steadying to jot down a couple of lines in a notebook — one thing they’re grateful for, one thing they’re quietly looking forward to, and a single word for how they want to feel that day.

    That’s it. Thirty seconds. It’s less about productivity and more about hearing your own voice before you hear everyone else’s. On a chaotic day it can be the difference between reacting all morning and feeling like you actually chose how to begin.

    When your morning isn’t yours to control

    All of this assumes a certain amount of quiet, and plenty of mornings don’t offer any. If there are small children in the house, the “first fifteen minutes to yourself” advice can feel like a joke.

    A couple of things that help when the morning belongs to everyone but you:

    • Waking a little before the household does, even by ten minutes, gives you a small anchor of quiet to stand on. Not to be productive — just to breathe before the noise.
    • If you feel groggy and heavy, splash cold water on your face. It sounds too simple to work, and it works anyway.
    • If your mind is already racing before your feet hit the floor, scribble the worries onto a scrap of paper. Getting them out of your head and onto the page tends to shrink them.

    Match the routine to the life you actually have, not the one on the internet. A single mother of two under five and a woman living alone and working from home are having completely different mornings, and both deserve to feel calm. That calm will look different for each of them, and that’s exactly as it should be.

    The one thing worth guarding

    If you take nothing else from this, take this: try not to touch your phone for the first fifteen to thirty minutes you’re awake.

    That window is small and quietly precious. The second you open messages or social media, you’ve handed the start of your day to other people — their requests, their moods, their highlight reels. Guard it a little. Drink the water, feel the warm cup, look out the window, and let the world in when you’re ready, not the instant your eyes open.

    A calm morning isn’t about doing more before breakfast. It’s about doing less, more gently. Pick one small thing from here — the glass of water, the phone in the hallway, the one song — and let it settle in for a couple of weeks before you add anything else. Calm builds slowly, and that’s fine. It’s supposed to.

    If you want to carry the same gentle energy into the rest of your week, our Sunday Reset Routine is a lovely companion piece, and if mornings are still a battle, 5 Habits for Easier Mornings has a few more small tricks worth stealing.

    Frequently Asked Questions

    Q: How early do I need to wake up for a calm morning routine?

    A: A calm routine does not require waking up at 5:00 AM. It only requires carving out 20 to 30 intentional minutes before your workday obligations begin, whether you wake up at 6:00 AM or 8:30 AM.

    Q: Should I drink coffee first thing in the morning?

    A: Dermatologists and neuroscientists recommend waiting 60 to 90 minutes after waking before your first cup of coffee. This allows your natural adenosine levels to clear, preventing the dreaded 2:00 PM afternoon energy crash.

    Q: What if I genuinely don’t have time for a 30-minute routine?

    A: Start with a ‘micro-routine’: 1 minute of deep belly breathing, 1 glass of water, and writing down your top priority for the day. That 2-minute investment transforms your mental state.

    Q: How long does it take for a new morning routine to feel natural?

    A: Research indicates habit formation takes approximately 21 to 66 days. Start with just one new habit (like delaying phone use for 15 minutes) for two weeks before stacking additional steps.

    Additional Details

    • Description: A morning routine should not feel like a boot camp. These practical strategies help you start each day with energy and intention, not anxiety and rush.
    • Published: 2026-06-20T00:00:00.000Z
    • Updated: 2026-09-07T00:00:00.000Z

    Images

    • (none listed)
  • Gel Manicure at Home: Step-by-Step DIY Guide

    Gel Manicure at Home: Step-by-Step DIY Guide

    📌 At a Glance (Key Takeaways)

    • Proper nail plate dehydration and cuticle prep account for 90% of gel manicure longevity.
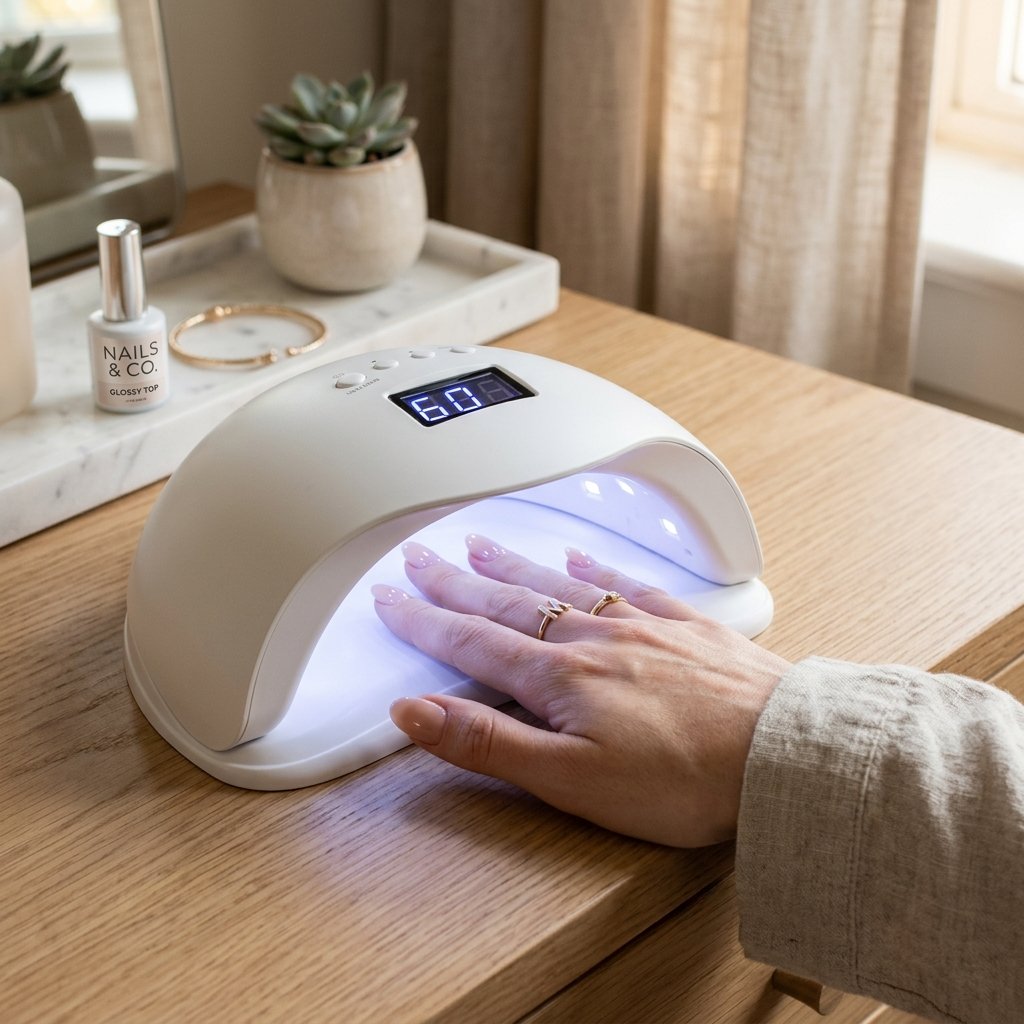
    • Requires a 36W or 48W LED/UV lamp with proper 60-second curing cycles for full polymerization.
    • Capping the free edge on every coat prevents premature chipping and tip peeling.
    • Safe removal via pure acetone soak-off prevents keratin damage and thinning nail beds.

    Prep your nails dry, keep every coat thin, and cap the free edge each time. Do those three things and an at-home gel manicure will last three weeks. Skip any one of them and it’ll lift by the weekend, no matter how expensive your polish is. That’s the part most tutorials bury: longevity is about mechanical preparation and thin layers, not the brand in your cart.

    A salon gel manicure is a treat, but the cost and the hours in the chair add up. Once you own a lamp and understand what the nail plate needs, you can get a glossy, chip-free finish at home that genuinely holds up. Here’s the whole process, plus the reasoning behind each step so you can troubleshoot your own results.

    Why gel behaves differently from regular polish

    Ordinary nail lacquer dries by evaporation, leaving a brittle film that chips within days. Gel is a different animal. It’s made of liquid acrylate oligomers and photo-initiators, and it doesn’t dry at all: it cures. When you put it under UV (365nm) or LED (405nm) light, the photo-initiators trigger a cross-linking reaction that binds the liquid into a dense, flexible plastic bonded to your nail. Fully cured, that shell shrugs off hot water and detergents. The catch is that curing has to be complete, which is why thin coats and the right lamp matter so much.

    What to have ready

    Lay everything out on a clean, lint-free towel before you start. Touching random objects mid-manicure transfers oil back onto nails you just dehydrated, and that’s a classic cause of lifting. You’ll want:

    • A dual-wavelength LED/UV lamp, ideally 36–48W. Underpowered mini-lamps can’t fully cure darker colors, which leads to wrinkling and, over time, allergic sensitization.
    • A nail dehydrator and an acid-free primer.
    • Gel base coat and a no-wipe top coat made for light curing (never air-dry base coats under gel).
    • Your pigmented gel colors.
    • 90%+ isopropyl alcohol and lint-free wipes. Cotton balls shed fibers that ruin a smooth coat.
    • A steel cuticle pusher, a 180-grit file, and a fine 220/240-grit buffer.
    • Jojoba cuticle oil for afterward.
    • Pure acetone and foil wraps for removal down the line.

    The application

    Prep dry. Don’t soak your hands first. Water swells the nail plate, and as that moisture escapes under the cured gel over the next two days, the nail shrinks and the gel lifts at the sides. Instead, push back the cuticle with a steel pusher, gently scrape away the thin dead skin stuck to the plate, and shape the free edge with a 180-grit file, working in one direction to avoid splitting the edge.

    De-shine. Take the fine buffer and lightly graze each nail in the direction of growth. You’re not thinning the nail, just knocking off the reflective oil sheen so the primer can grip. A few light passes is plenty.

    Dehydrate and prime. Scrub each plate with a wipe soaked in 90%+ alcohol, paying attention to the sidewalls and cuticle line. Once dry, brush on one thin swipe of acid-free primer and let it air-dry about 30 seconds until it looks matte or slightly tacky.

    Base coat, and cap the edge. Apply a paper-thin base coat, keeping the brush about a millimeter off the cuticle so you don’t flood the skin. Then run the brush along the very edge of the nail tip. This “capping” is the step people skip and then wonder why they chip: it seals the free edge so water can’t creep between the nail and the polish. Cure 30 seconds under LED (60 under UV).

    Two thin color coats. Use a three-stroke method: one stroke down the center, then one along each side. The first coat should look almost translucent. Resist the urge to make it opaque in one thick layer, because light can’t penetrate dense pigment, and the polish underneath stays wet and wrinkles. Cap the edge, cure 60 seconds, then repeat with a second thin coat. If any gel touches skin, wipe it off with an alcohol-dipped brush before curing.

    Top coat and oil. Brush on a smooth layer of no-wipe top coat over everything, cap the edge one more time, and cure a full 60 seconds. If you’re using a wipe-off top coat instead, remove the tacky layer with a fresh alcohol-soaked wipe. Finish by massaging a drop of jojoba oil into each cuticle.

    Curing times shift with your lamp, so use this as a rough guide:

    Lamp Base Color Top
    Compact home LED (24W) 45s 60s 60s
    Pro LED/UV (48–54W) 30s 60s 60s
    Fluorescent UV (36W) 60s 120s 120s

    Removal without wrecking your nails

    Bad removal ruins more nails than anything else. Never pick or peel cured gel off, because it takes the top layers of your natural nail with it. Instead:

    1. Buff off the shiny top coat with a coarse 180-grit file until the surface looks chalky. Acetone can’t get through an intact top layer.
    2. Soak half a cotton ball in pure acetone (not diluted remover) and press it onto the nail.
    3. Wrap each fingertip snugly in foil to trap body heat, which speeds things along.
    4. Wait 12 to 15 minutes without peeking.
    5. Twist off the foil; the gel should look puffy and crumbly. Push it away gently with an orangewood stick, and re-wrap any stubborn spots for a few more minutes rather than scraping.

    Making it last

    A few habits stretch the wear time. Skip long baths and dishwashing for the first couple of hours while the polymers stabilize. Oil your cuticles twice a day, since flexible nails bend under pressure instead of cracking. Wear gloves for cleaning, because household sprays and dish soap slowly degrade the top coat. And stop using your nails as tools to pop lids or scrape labels; that stress concentrates right at the weakest point.

    For keeping the natural nail underneath healthy between manicures, see “How to Strengthen Natural Nails”, and for a design to try next, our “Modern French Tip Nails” guide walks through the technique.

    Frequently Asked Questions

    Why does my gel polish peel off in one whole sheet after two days?

    This is almost always caused by improper prep: either natural oils were left on the nail plate, hands were soaked in water before application, or gel polish was flooded onto the cuticle skin, breaking the airtight seal.

    Does curing gel polish under UV/LED lamps damage the skin?

    LED nail lamps emit very low levels of UVA light for brief 60-second intervals. However, wearing fingerless UV protection gloves or applying broad-spectrum mineral sunscreen to hands 20 minutes prior completely eliminates skin risks.

    How long can you safely leave a gel manicure on?

    A gel manicure should be safely soaked off after 2 to 3 weeks. Leaving gel on for 4+ weeks creates leverage stress on the nail bed as your natural nail grows out, increasing the risk of painful breaks.

    Can I use regular nail polish with a gel top coat?

    Only if the regular polish is 100% dry (which takes 12 to 24 hours of air drying). If moisture or solvents remain trapped under the cured gel top coat, the polish will wrinkle and peel immediately.

    Additional Details

    • Description: Skip the salon prices and master the art of the perfect, long-lasting DIY gel manicure at home with our detailed guide.
    • Published: 2026-06-15T00:00:00.000Z
    • Updated: 2026-09-07T00:00:00.000Z

    Images

    • (none listed)
  • Modern French Tip Nails: 5 Trending Variations

    Modern French Tip Nails: 5 Trending Variations

    📌 At a Glance (Key Takeaways)

    • Modern French manicures replace stark white bands with micro-tips, metallic chrome, and negative space.
    • Almond, oval, and squoval shapes visually elongate fingers and create elegant tip proportions.
    • Using a silicone stamper or fine liner striping brush guarantees razor-sharp smile lines at home.
    • Milky nude or translucent pink jelly base colors provide a soft, contemporary foundation.

    People still picture the French manicure as a bit dated: chalky white tips, thick and blocky, on chunky square nails circa 2003. That version has aged, sure. But the French tip itself never went anywhere. It just got quieter and more precise. The line got thinner, the colors opened up, and negative space crept in. Done well, a modern French reads as clean and current, not nostalgic.

    A quick bit of history explains why it endures: Jeff Pink created the look in 1975 for Hollywood actresses who needed nails that worked with any costume change. That adaptability is still the whole appeal. Swap the color or the line and it suits almost any outfit or occasion. Here are the variations worth knowing, roughly in order of how easy they are to pull off at home.

    The five that actually get requested

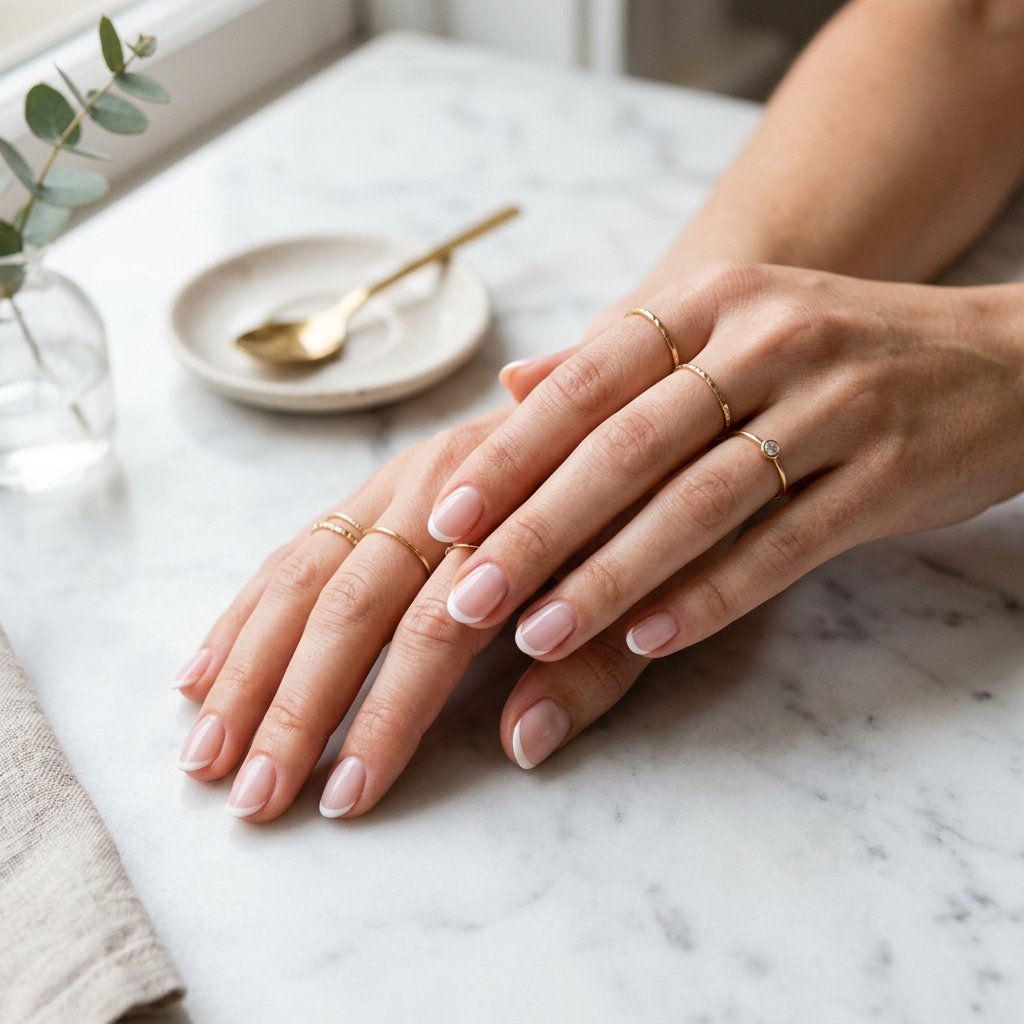
    The micro French. The minimalist favorite. Instead of a wide band, you trace a razor-thin line, under a millimeter, right along the tip, usually over a milky or sheer base. It’s flattering on short natural nails and about as understated as nail art gets. This is the easiest to attempt yourself.

    Colored and pastel tips. The quickest way to make the look feel modern is to drop the white entirely. A soft pastel for spring, a jewel tone like hunter green or navy for colder months, or a different pastel on each finger for something playful. A pale blue tip over a glossy pink base is a clean, pretty combination.

    Chrome tips. Gold, silver, or iridescent chrome on the tips catches the light and looks expensive, especially over a matte nude base where the contrast between flat and reflective does the work. It’s the hardest of the group because it involves chrome powder over a flash-cured top coat, but the payoff is worth it for events.

    The double French. Two thin parallel lines at the tip with a sliver of bare nail between them. Graphic and geometric, it suits anyone who likes structural design. High-contrast pairings like black and white or navy and gold show it off best.

    The V-cut (chevron). Instead of a rounded smile line, two diagonal lines meet at a point in the center of the tip. It visually lengthens the finger, which is why it’s popular on almond and coffin shapes.

    If you want to see where chrome and structural tips fit into the bigger picture, our “Acrylic Nail Trends 2026” guide covers the shapes that carry these designs best.

    Here’s a quick way to match a variation to your nails:

    Variation Length Shape Difficulty
    Micro French Short Square / round Easy
    Colored Medium Oval / almond Medium
    Chrome Long Almond Hard
    Double Medium Almond Hard
    V-cut Long Coffin / stiletto Medium

    Getting a clean line at home

    The smile line is where home attempts fall apart. Drawing a smooth, even curve freehand is genuinely hard, so most people who do this well cheat with one of three methods.

    The silicone stamper trick is the most reliable. Paint a thick strip of your tip color onto a soft silicone jelly stamper, then press your fingertip into it at a 45-degree angle. The silicone wraps around your nail and transfers a perfectly even curve in one motion. Cure, then clean up any polish that got onto your skin with a flat brush dipped in acetone or alcohol.

    If you’d rather not buy a stamper, curved paper stencils work too: stick them onto your dried base coat, paint the tips, and peel them off while the polish is still wet. And if you do go freehand, don’t chase perfection with the brush. Draw the line roughly, then sharpen it afterward with an angled brush dipped in remover, sweeping away the excess until the curve is crisp. Cleanup is where the clean line really comes from.

    One note on proportion, since it’s the thing that separates a modern French from an old one: keep the tip thin and let it follow the natural curve of your free edge. A tip that’s too thick or drawn straight across is exactly what makes the look feel stuck in an earlier decade.

    For a seasonal spin, our “Fall Nail Colors” guide has deeper shades that work beautifully as colored tips once the weather turns.

    Frequently Asked Questions

    Can you do French tip nails on short natural nails?

    Yes! The micro French (baby French) was specifically created for short nails. Keeping the line under 1mm prevents the tip from making short nails appear stubby.

    What is the best base color for a modern French manicure?

    Translucent ‘jelly’ nudes, sheer milky whites, and soft petal pinks that match your natural nail bed undertone provide the most modern, seamless foundation.

    How do I make my French tips look symmetrical on both hands?

    Mark the center point of each nail tip with a tiny dot first using a toothpick or fine brush. Then paint from the outer corner down to the center point on each side.

    Why do French tips chip faster than a full color manicure?

    Because tips endure the highest mechanical friction from typing and opening packages. Always cap the free edge with your top coat and apply cuticle oil daily to prevent brittleness.

    Additional Details

    • Description: From micro-tips to metallic accents, explore 5 modern ways to reinvent the classic French manicure for a contemporary look.
    • Published: 2026-06-10T00:00:00.000Z
    • Updated: 2026-09-07T00:00:00.000Z

    Images

    • (none listed)
  • Fall Nail Colors: Trending Shades for Autumn 2026

    Fall Nail Colors: Trending Shades for Autumn 2026

    📌 At a Glance (Key Takeaways)

    • Autumn manicures feature rich earthy tones: deep cherry mocha, espresso, olive, and spiced pumpkin.
    • Velvet cat-eye magnetics and glossy jelly finishes replace flat matte lacquers this season.
    • Tortoiseshell accents and metallic bronze French tips add luxurious dimensional texture.
    • Pairing warm undertones with coordinating wool knitwear elevates seasonal aesthetics.

    The first properly cold morning is usually when it happens. You reach for a chunky sweater instead of linen, the light turns amber earlier in the evening, and suddenly the bright coral you loved in July looks wrong against everything you’re wearing. Nails follow the wardrobe. Autumn pulls color toward the warm, moody, slightly edible end of the spectrum, and this year the standouts lean into that hard.

    The shades doing the heavy lifting

    Cherry mocha. A blackened crimson that reads nearly black in dim light but flashes deep wine tones in the sun. It’s the sophisticated, slightly sultry choice, and it flatters every skin tone, which is rare for a dark shade. Keep it high-gloss.

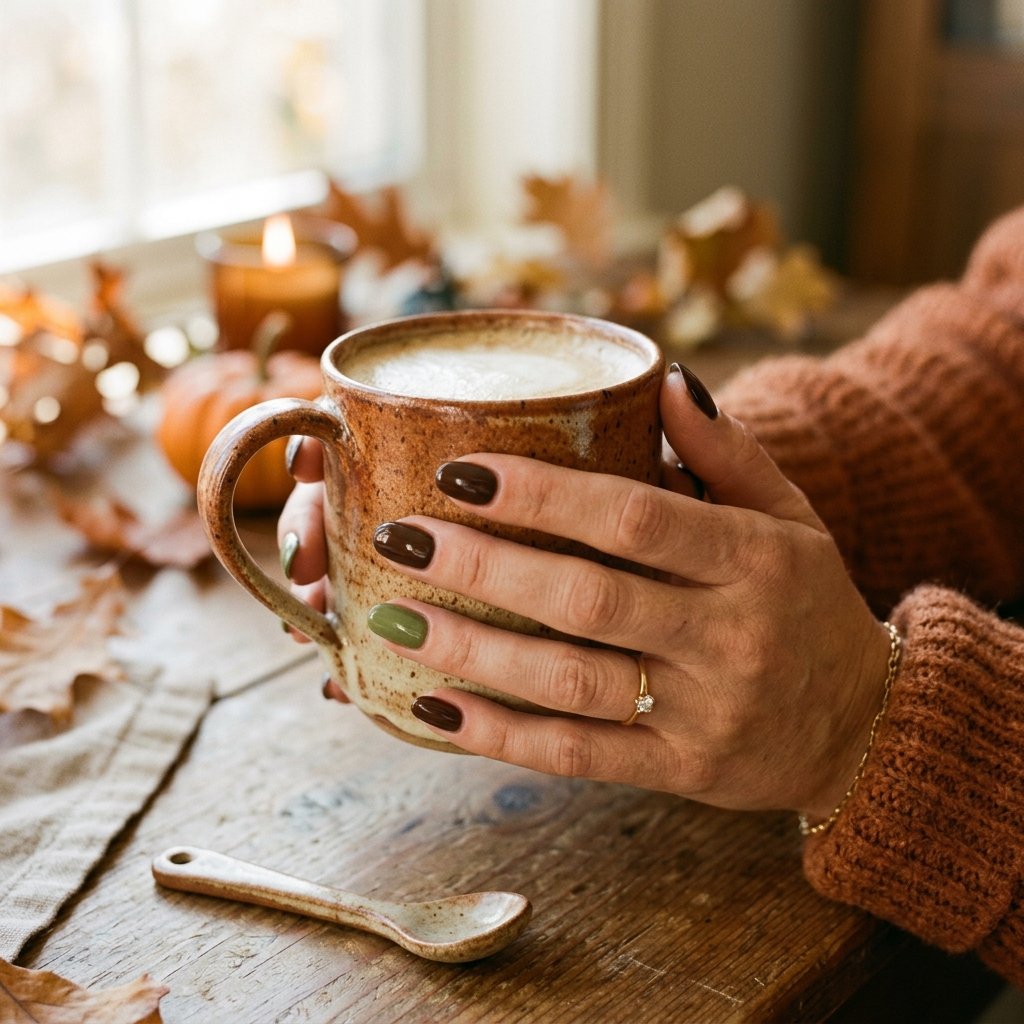
    Espresso and chocolate brown. Brown has taken over the slot black used to hold. It has the same drama but a warmer, softer undertone that’s kinder to most hands. A glossy glass finish makes it look like melted chocolate; a chrome micro-French line dresses it up. This is the shade to reach for if you find true black a little harsh.

    Spiced amber and burnt terracotta. Somewhere between rusty orange and warm brown, this captures autumn foliage without tipping into costume territory. In a translucent jelly finish it glows like poured honey, and it’s the ideal base for hand-painted tortoiseshell.

    Olive and forest green. A muted, dusty green that behaves like a neutral. It sits beautifully next to gold jewelry, cream knitwear, and denim, and it’s more wearable day to day than people expect. Matte or a soft velvet magnetic finish suits it.

    Milky buttercream. For anyone who wants to stay light but move on from summer’s sheer pinks. It’s a warm, soft cream with yellow undertones, clean and polished but cozy rather than clinical. Lovely with chunky white knits.

    Rounding these out, a molten bronze or antique copper chrome covers the evening-and-holiday end, with enough reflective depth to feel dressed up.

    Matching a shade to your hands

    Undertone matters more than the exact color name. Here’s a rough guide:

    Shade Undertone Jewelry Feel
    Cherry mocha Universal Gold or silver Sultry, polished
    Chocolate brown All tones Gold / rose gold Quiet luxury
    Spiced terracotta Warm Gold Cozy, vivid
    Olive green Neutral / warm Brass Earthy, chic
    Milky buttercream All tones Silver / gold Clean, soft

    Cool undertones can push a warm brown slightly muddy, so if that’s you, lean toward the cherry and plum end where the cool base works in your favor.

    A tortoiseshell accent, if you want one

    Tortoiseshell looks intricate but it’s forgiving, since the whole point is irregularity. Start with a coat of sheer amber jelly gel and cure it. Using a dotting tool, dab uneven patches of chocolate brown across the nail, then tap the edges with a flat brush to blur them, and cure. Brush another sheer amber layer over the top to push those spots into the background. Add a few smaller, intense black dots overlapping the brown for depth, cure, then seal with a plump high-shine top coat. Done on one accent nail against a solid espresso or amber base, it looks far more expensive than the effort suggests.

    Don’t forget the hands themselves

    The one thing autumn does to nails that no color can fix is dry them out. Indoor heating and cold air pull moisture from the plate, and brittle nails and hangnails follow. Keep a rich hand cream with shea butter or ceramides nearby and use it more often than feels necessary. Oil your cuticles every night before bed, and wear gloves for dishes and cleaning so hot water and detergent don’t undo the effort. No shade looks good on a cracked, peeling nail, however on-trend it is.

    If you’re refreshing the rest of your look for the season, our Summer-to-Fall Outfits guide pairs well with these shades, and if you’re keeping things low-key, Short Nail Designs shows how the deeper colors read on shorter nails.

    Frequently Asked Questions

    What is the single most popular fall nail color this year?

    Cherry mocha (a deep blackened wine-red) is the undisputed star shade of the season, followed closely by rich espresso brown and olive green.

    Can you wear dark fall nail colors on short nails?

    Absolutely! In fact, dark shades like espresso, navy, and deep burgundy look exceptionally chic, tailored, and modern on short, clean squoval natural nails.

    How do you achieve the trendy ‘velvet nail’ look for fall?

    Apply a magnetic cat-eye gel polish, then hold a specialized cylindrical bar magnet beneath and around the sides of your fingertip to disperse the magnetic shimmer into a soft 3D velvet glow before curing.

    Do dark fall nail polishes stain natural nails?

    Highly pigmented autumn colors (especially reds and dark greens) can stain nail plates. Always apply a high-quality base coat first to act as a protective barrier.

    Additional Details

    • Description: Embrace the cooler weather with the most-pinned cozy nail shades for autumn, including deep matcha green and rich chocolate brown.
    • Published: 2026-06-05T00:00:00.000Z
    • Updated: 2026-09-07T00:00:00.000Z

    Images

    • (none listed)
  • Acrylic Nail Trends 2026: Modern Shapes, Colors & Styles

    📌 At a Glance (Key Takeaways)

    • Modern acrylic manicures favor natural medium lengths, almond silhouettes, and lightweight sculpting.
    • 3D chrome accents, milky ombré, and aura designs dominate current salon requests.
    • Proper apex construction ensures structural integrity without unnatural bulkiness.
    • Regular infills every 2 to 3 weeks maintain nail bed balance and prevent lifting.

    The idea that acrylics ruin your nails is stubborn, and mostly wrong. Acrylic itself doesn’t damage the nail underneath. Bad application, skipped fills, and prying them off do. Plenty of people wear acrylics for years with healthy nails under them because they get them done properly and take them off properly. So before writing them off, it’s worth knowing what modern acrylics actually look like, because they’re a long way from the thick, sharp talons the reputation is based on.

    That old look is gone from good salons. Acrylic is a sculpting medium, made by combining liquid monomer and powdered polymer, and technicians now use it to build thin, contoured enhancements that follow the natural curve of the nail rather than sitting on top like armor. Flush at the cuticle, balanced at the apex, weeks of strength without straining the nail beneath. The material didn’t change so much as the taste did.

    Picking a shape

    Shape is the foundation, and it affects durability as much as looks. A well-chosen shape can lengthen the hand and hold up to daily life; the wrong one snags and snaps.

    • Almond is the strongest of the tapered shapes. It narrows to a soft rounded point and distributes stress evenly down the nail, so it’s both flattering and resilient. A good default.
    • Squoval blends a flat top with rounded corners. It’s the most practical shape going, easy to type with and slow to snag, which is why it wears so well.
    • Coffin (ballerina) has straight tapered sides and a flat tip. Bold and modern, with a big flat canvas for art, though the corners can catch.
    • Square is clean and architectural, best on longer nail beds.
    • Stiletto tapers to a fine point. High-fashion, high-maintenance, and delicate at the tip; not the one to choose if you’re rough on your hands.

    Here’s how they compare where it counts:

    Shape Durability Everyday practicality Upkeep
    Almond Highest High Moderate
    Squoval Very high Highest Low
    Coffin High Moderate High
    Square Strong High Low–moderate
    Stiletto Delicate tip Low Very high

    What people are actually asking for

    The art has moved toward texture and dimension rather than flat color. A few directions keep coming up.

    The natural almond with a sculpted translucent blush base is the perennial request, and for good reason: it’s the most resilient shape with a universally lengthening line. Beyond that, a semi-sheer milky base with raised 3D builder-gel swirls coated in liquid chrome gives a futuristic, catch-the-light finish. Airbrushed aura gradients, a soft diffused glow blooming from the center of each nail, still feel genuinely modern and dreamy. Short tapered coffin at a practical length gives the architectural edge without sacrificing the ability to use your hands. And velvet magnetic cat-eye overlays, where iron-particle gel is dragged with a magnet, shift under light like crushed velvet.

    If you’re planning acrylics for an event, our Wedding Nails Guide shows how these shapes translate into bridal looks.

    Keeping your natural nails healthy underneath

    This is the part that determines whether acrylics are fine or a disaster, so it’s worth being specific.

    Book your infills every two to three weeks. As your nail grows, the reinforced apex creeps toward the tip, and once it’s out past the fingertip a small knock can snap the enhancement and tear the natural nail with it. Staying on schedule keeps the strong point where it belongs.

    Never pry a lifting nail off. If one starts to lift, leave it and have it soaked off professionally; pulling it takes the top layers of your natural nail along for the ride. Oil your cuticles twice a day, because acrylic needs a flexible, hydrated nail underneath to bond to, and dry nails separate. And wear gloves for cleaning, since bleach and harsh dish soap degrade the polymer and leave it brittle and discolored.

    The removal rule deserves repeating because it’s where most of the “acrylics wrecked my nails” stories actually come from. Acetone soak, patience, gentle nudging, never force. Do that and the nail underneath comes out intact.

    A couple of everyday habits protect the set between visits: don’t use your nails to open cans or scrape labels, since that force lands right on the lateral walls and cracks the seal, and give fresh enhancements a couple of hours before long hot-water exposure so the bond fully sets.

    If your natural nails already feel thin from a previous set, don’t just pile on more acrylic. Our guide to How to Strengthen Natural Nails covers how to rebuild them first, so your next set has something solid to sit on.

    Frequently Asked Questions

    How long do acrylic nails last between salon visits?

    A well-applied set of acrylics lasts 2 to 3 weeks before requiring an infill (filling the new growth gap at the cuticle). A complete fresh set should typically be replaced every 3 to 4 months.

    Do acrylic nails ruin your natural nails permanently?

    No. Acrylic itself does not damage nail keratin. Nail damage is almost entirely caused by improper prep (over-drilling the natural nail with an e-file) or forceful ripping off during removal.

    What is the difference between acrylic and builder gel (BIAB)?

    Acrylic is a two-part powder-and-liquid system that cures via chemical reaction, creating a rigid structure. Builder gel is an oligomer that cures under UV/LED lamps, offering slightly more flexibility and a gentler soak-off process.

    Can I type on a computer keyboard with acrylic nails?

    Yes! Medium almond and short squoval shapes are typing-friendly. Train yourself to type with the pads of your fingers rather than tapping nail tips directly against keycaps.

    Additional Details

    • Description: Acrylics offer a creative canvas that gel and regular polish simply cannot match. These are the acrylic trends setting the tone for 2026.
    • Published: 2026-05-31T00:00:00.000Z
    • Updated: 2026-09-07T00:00:00.000Z

    Images

    • (none listed)
  • How to Style Curtain Bangs: Routine for Every Hair Type

    How to Style Curtain Bangs: Routine for Every Hair Type

    📌 At a Glance (Key Takeaways)

    • Curtain bangs are cut shorter in the center and sweep outward to frame cheekbones and jawlines.
    • Suitable for round, oval, heart, and square face shapes by adjusting parting angle and length.
    • Round brush blowouts or velcro rollers provide the most reliable 5-minute daily styling.
    • Requires minimal commitment compared to blunt straight-across bangs and grows out gracefully.

    Why do curtain bangs look so easy in the salon and so stubborn the next morning? It is the single most common thing women say when they come back for a trim. The cut itself is forgiving, but the styling has a direction to it that nobody explains at the chair: everything gets dried forward first, then swept back. Get that one move right and the rest falls into place.

    Curtain bangs have stayed popular for a good reason. They frame the eyes and cheekbones, they suit almost every face, and they grow out gracefully into face-framing layers instead of the awkward hedge that blunt fringe becomes. The trade-off is that they need a minute of styling to sit the way you want. Here are the three ways to do it.

    The round-brush blowout

    This is the classic soft, bouncy, 70s-leaning version.

    1. Wet the bangs even if the rest of your hair is dry, and add a little heat protectant.
    2. Set a medium round brush on top of the section and roll the hair forward, toward your forehead.
    3. Dry it forward with the nozzle pointed down to keep the cuticle smooth.
    4. Once it’s dry, roll the brush back and away from your face, then slide it out so the bangs fall open to the sides.

    The velcro roller, if you’d rather not fight with heat

    Great for volume with almost no active effort.

    1. Mist the bangs damp with water or a texturizing spray.
    2. Wrap them around a large velcro roller, rolling away from your face.
    3. Leave it in for 15 to 20 minutes while you do your makeup.
    4. Unroll gently and shake out the roots.

    The flat-iron pinch for a sleeker finish

    1. Gather both sides of the fringe together.
    2. Clamp at the roots, pull down, and curve the iron inward toward your face and then out at the ends in a soft C.
    3. Pinch the two inner corners together at the bridge of your nose to set that draped, parted look.
    Method Styling time Volume Hold
    Round brush 5 minutes High Medium (needs hairspray)
    Velcro rollers 20 minutes (passive) Maximum Long-lasting
    Flat iron 2 minutes Medium High

    Your texture changes the approach a little. Wavy and curly hair does best worked with, not against: a curl cream and a diffuser, drying the roots in the direction you want them to lie. Fine and straight hair needs volume insurance, so a little mousse at the roots before you dry keeps the bangs from going flat. There’s more on that in our guide to fine hair volumizing.

    Getting the shape to suit your face

    Curtain bangs are adaptable, which is part of their appeal, but small tweaks help. Longer bangs that hit the jawline with a diagonal angle lengthen a rounder face. Soft, wispy ends just below the cheekbones take the edge off a strong, square jaw. Shorter bangs that graze the brow and widen at the cheekbones balance a broad forehead against a narrower chin. And if your face is oval, more or less anything from bridge-of-nose to jawline works.

    The mistakes that cost people their bangs

    • Cutting them soaking wet. Wet hair stretches, and bangs cut wet can spring up an inch or two shorter than you wanted once they dry.
    • Rolling them the wrong way. Under and toward your eyes gives you a helmet; up and back gives you the swoop.
    • Heavy wax on an oily forehead. It clumps the fringe and looks greasy by lunch. Keep product light.
    • Fighting your cowlick. Rough-dry with your natural part, not against it, or the bangs won’t sit open evenly.

    For a full-length look that plays well with this fringe, see our butterfly haircut guide, which is practically built around curtain bangs.

    Frequently Asked Questions

    Can you wear curtain bangs with naturally wavy or curly hair?

    Absolutely. Naturally wavy curtain bangs create a gorgeous bohemian look. Use a curl-defining cream and diffuse gently, or smooth the roots slightly with a round brush for soft framing.

    How often do curtain bangs need to be trimmed?

    To maintain their optimal cheekbone sweep, schedule trims every 4 to 6 weeks. However, because of their tapered cut, they can grow into face-framing layers without looking messy.

    How do I fix a cowlick in my curtain bangs?

    Wet the cowlick completely, then blow-dry the roots back and forth across your forehead in an ‘X’ pattern with a flat brush before styling with a round brush.

    Can curtain bangs be styled without heat?

    Yes! Wrap slightly damp bangs around a medium velcro roller right after washing and allow them to air-dry completely while you finish your skincare routine.

    Additional Details

    • Description: Curtain bangs are the ultimate face-framing look. Learn the step-by-step styling secrets using a round brush, rollers, or flat iron.
    • Published: 2026-05-26T00:00:00.000Z
    • Updated: 2026-09-07T00:00:00.000Z

    Images

    • (none listed)
  • Layered Haircuts by Face Shape: Best Cut for You

    📌 At a Glance (Key Takeaways)

    • Strategic interior layers shift volume to balance specific facial angles and bone structures.
    • Round faces benefit from long vertical layers, while heart and square shapes need chin-softening cuts.
    • Blended point-cutting ensures layers move seamlessly without harsh horizontal lines.
    • Choosing the right layer starting point is the secret to highlighting eyes, cheekbones, or collarbones.

    People tend to think layers are one thing: hair, but with some shorter bits in it. They’re actually a handful of distinct techniques, and picking the wrong one for your face can make your hair look thinner, wider, or more lopsided than it did before you sat down. A layered cut reshapes the whole silhouette of your hair, and the difference between a mediocre version and a great one is almost entirely about matching the technique to your face and your texture.

    Reading your face shape

    The logic is straightforward once you name the goal. A layered cut is a frame, and the right frame either lengthens, softens, or balances what’s already there.

    Round faces want the illusion of length and a bit of angle. Long layers that start at or below the chin pull the eye downward and narrow the cheeks. Steer clear of short, choppy layers around the cheekbones, which pile width exactly where you don’t want it. A deep side part or a long curtain fringe reinforces the effect.

    Square faces are all about softening a strong, angular jaw. Feathered layers that begin around the jaw with wispy ends round off the corners; a collarbone lob or a textured shag does this gently. Blunt cuts landing right at the chin do the opposite and sharpen the angles.

    Heart faces carry a wider forehead and a narrower chin, so the job is to add weight low. Chin-length and collarbone layers that kick outward put volume around the jaw and neck and rebalance the proportions. Side-swept pieces near the forehead help too.

    Oval faces get to experiment; the proportions are balanced enough that nearly any technique reads well. This is where curtain bangs, shag layers, and the butterfly cut all shine.

    Diamond faces, with dramatic cheekbones and a narrower forehead, do best with soft cheekbone-skimming bangs and rounded interior layers that widen the top and calm the middle.

    The techniques, so you know what you’re asking for

    Stylists reach for different tools depending on your hair, and knowing the vocabulary changes the conversation.

    Technique What it does Best for
    Slide cutting Scissors glide down the shaft for soft, blended layers Fine to medium straight hair
    Point cutting Scissors cut vertically into the ends for piecey texture Thick, coarse hair needing weight off
    Razor cutting A blade feathers the ends ultra-soft Medium-density wavy hair
    Invisible layering Interior layers that add movement without changing the outline Anyone wanting subtle volume

    The reason this matters: ask for “layers” and leave it there, and you’re trusting the stylist to guess. Point-cutting fine hair thins it further; slide-cutting thick hair barely dents the bulk. The technique is the decision.

    Talking to your stylist

    Communication is most of the outcome. Bring three to five reference photos, but bring one of something you don’t want too, because “I don’t want harsh, choppy shelves” tells a stylist more than five flattering pins do. State your boundaries out loud: “I want movement, but I don’t want the ends to look thin” gives them something concrete to protect. Use your finger to point at where you want the shortest layer to fall, right at the collarbone, or right at the jaw, and ask them to show you before they cut.

    And be honest about your real routine. A layered cut should look good air-dried, not only after twenty minutes with a round brush. If you air-dry most days, say so, and let them tailor the texturizing for wash-and-wear. A cut that only works when you fuss over it isn’t the right cut for your texture.

    A quick reference

    If you like having it laid out, here’s where the shortest layer tends to start for each shape:

    Face shape Shortest layer starts Silhouette
    Round 1-2 inches below chin Long cascading layers
    Square At the jawline Textured shag or lob
    Heart Chin level Outward-flaring lob
    Oval Cheekbone or collarbone Butterfly or classic layers
    Diamond Mid-cheekbone Soft curtain lob

    The right layers genuinely change how you feel about your hair every morning. Take a little time to understand your face shape, be clear about what you want and don’t want, and invest in a cut that works with your natural texture instead of against it. If you’re drawn to the softer, lived-in end of layering, our guide to the modern shag is a good next read.

    Frequently Asked Questions

    Can curly hair have layers tailored by face shape?

    Yes! In fact, curly hair requires layers to prevent the bottom-heavy ‘triangle’ shape. A dry curl-by-curl cut ensures layers distribute volume evenly around your facial features.

    How do I determine my exact face shape?

    Pull your hair back completely and measure or photograph your face straight-on. Compare the width of your forehead, cheekbones, and jawline against your overall facial length.

    Will layers make thin hair look thinner?

    Too many short layers can thin out the perimeter. However, subtle long layers with a blunt perimeter add movement without reducing perceived density.

    How frequently do layered haircuts need trimming?

    Layered haircuts generally require maintenance trims every 8 to 10 weeks to prevent layers from losing their intentional shape.

    Additional Details

    • Description: Layers add movement, volume, and dimension to any hair type. This guide matches the right layering technique to your specific face shape for a result that flatters your features.
    • Published: 2026-05-21T00:00:00.000Z
    • Updated: 2026-09-07T00:00:00.000Z

    Images

    • (none listed)
  • 5-Minute Everyday Hairstyles: Quick Looks for Busy Mornings

    5-Minute Everyday Hairstyles: Quick Looks for Busy Mornings

    📌 At a Glance (Key Takeaways)

    • Quick, elevated hairstyles rely on smart accessories rather than complicated braiding techniques.
    • Claw clips, silk scrunchies, and French pins create secure updos in under 60 seconds.
    • Prepping hair with dry shampoo the night before cuts morning styling time in half.
    • Effortless hairstyles look intentional when paired with soft face-framing tendrils.

    It’s 7:52, your coffee’s going cold, and you have exactly the stretch between brushing your teeth and grabbing your keys to do something with your hair. Most tutorials assume you’ve got half an hour and a curling iron. This is for the other mornings, the real ones. Every style here takes a few minutes, needs almost no tools, and looks deliberate rather than rushed.

    One thing up front, because it changes everything: the best fast hair starts the night before. Two minutes braiding damp hair before bed gives you natural waves by morning, and waves grip. Every style below holds better on day-two, slightly textured hair than on freshly washed, slippery strands.

    The quick ones

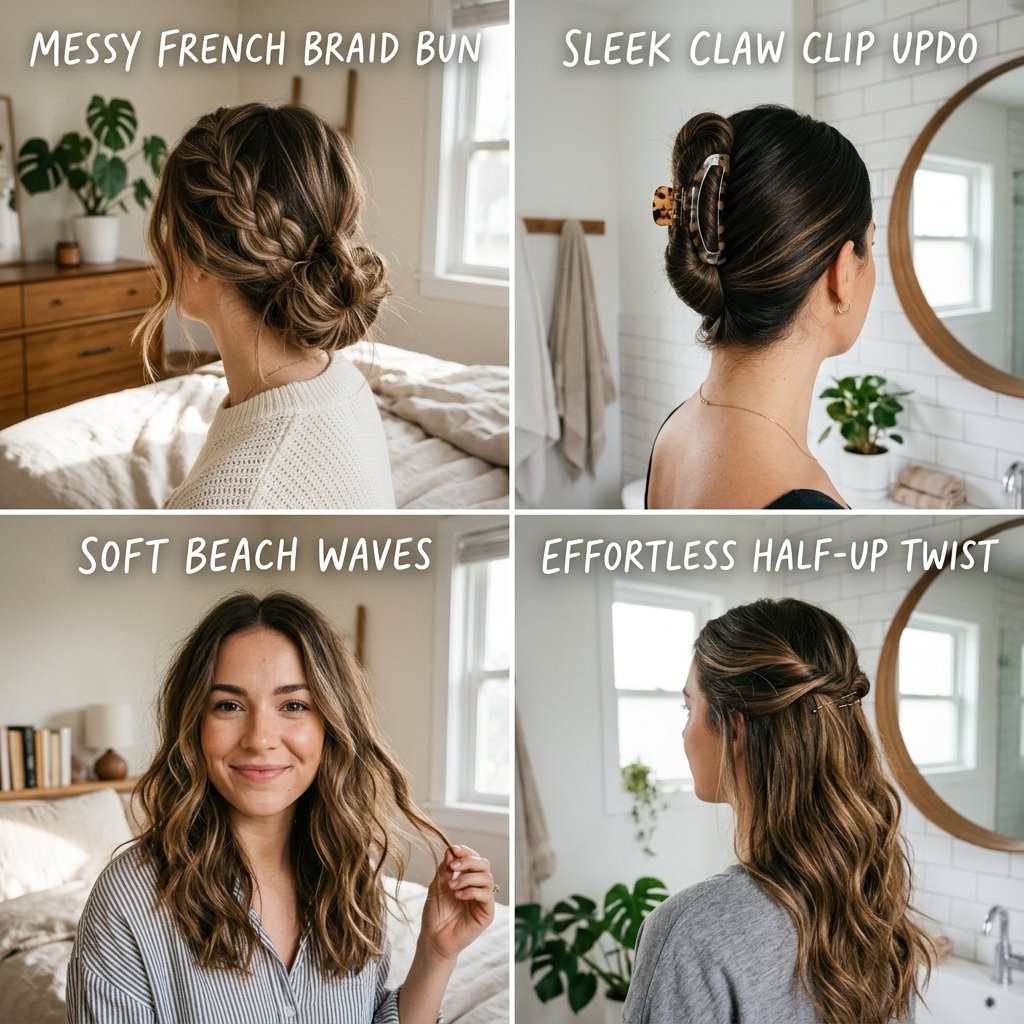
    The claw clip twist. Gather your hair, twist it loosely up from the nape, and clip. Leave a couple of front pieces out. Thirty seconds, and it works on anything from shoulder-length to waist-length. If you want to push the claw clip further than a lazy twist, we’ve got a whole guide to claw clip hairstyles.

    The slicked-back low bun. A little gel or edge control along the hairline, smooth everything back, twist into a low bun, and lock it with an elastic and two bobby pins. A boar-bristle brush instead of your hands gives a cleaner finish and tames flyaways better than a comb. Polished enough for the office.

    The scarf headband. Fold a square scarf into a strip and tie it over your head, knotting at the nape or behind one ear. It’s the fastest way to make unwashed hair look intentional, and it adds a little color.

    The two-strand pull-back. Take a one-inch piece from each temple, twist each away from your face, and pin the two together at the back with a single bobby pin. Everything else stays down.

    The messy French braid. Once the technique’s in your hands this is about three minutes. Start at the crown, braid loosely to the nape, then finish as a regular braid. The trick is to gently tug the edges of each section afterward so it looks full instead of tight.

    • Start with dry, textured hair for grip
    • Braid loosely; don’t pull tight
    • Secure the end with a small elastic
    • Pull each section wider to fake fullness

    A few more worth learning

    Once the basics are muscle memory, these two look like more effort than they are. The bubble ponytail: tie a mid-height pony, add clear mini-elastics every couple of inches down the length, and tug each segment outward into a “bubble.” And the Gibson tuck: make a loose low ponytail, split a gap above the tie, flip the tail up and through, then tuck the ends into the pocket and pin. Both read as far fussier than the four minutes they take.

    If your hair is fine and tends to slide out of everything, the same tricks that build volume also give clips and pins something to hold; our fine hair guide covers the texture side of that.

    What to actually keep on hand

    You don’t need a drawer full of gear. This is the whole kit:

    Tool Why Rough cost
    Large claw clip The most versatile single thing you can own $5-15
    Thin bobby pins For every twist-and-pin style $3 for 50
    Small clear elastics Invisible hold for braids and ponytails $4 for 100
    Texturizing spray Grip for clean hair that’s too slippery to style $8-18

    The night-before trick, in full

    It’s worth repeating because it does the most work for the least effort. Braid slightly damp hair into two loose braids before bed. In the morning, unravel them, run your fingers through, and add a light mist of texturizing spray. That base of natural texture makes every single style here hold longer and sit better. Fast hair doesn’t have to be sloppy hair, and after about a week of doing this, none of it takes any thought at all.

    Frequently Asked Questions

    How do I make a claw clip stay in thick, heavy hair?

    Look for XL claw clips with double-row interlocking teeth or flat-back French designs. Alternatively, secure your hair with a clear elastic first before clipping.

    What is the best way to hide greasy roots in a fast hairstyle?

    A sleek low bun with a clean center part turns oily roots into an intentional high-fashion ‘clean girl’ aesthetic. Smooth with a styling wax stick for a high-gloss finish.

    How can I add volume to a low ponytail quickly?

    Place a small bobby pin or mini claw clip vertically underneath the hair tie inside the ponytail. This props up the hair, preventing it from drooping flat against your neck.

    Are fast updos damaging to hair over time?

    Not if you avoid tight rubber elastics. Using silk scrunchies, French pins, and claw clips distributes tension evenly and prevents traction breakage.

    Additional Details

    • Description: Rushed mornings do not have to mean boring hair. These 5 styles take five minutes or less and look polished enough for the office, brunch, or errands.
    • Published: 2026-05-16T00:00:00.000Z
    • Updated: 2026-09-07T00:00:00.000Z

    Images

    • (none listed)
  • Short Haircuts for Women: 4 Bold, Low-Maintenance Styles

    📌 At a Glance (Key Takeaways)

    • Short haircuts eliminate dead weight, framing facial features and elongating the neck.
    • Modern variations include the French bob, textured bixie, Italian blunt cut, and layered pixie.
    • Requires less daily drying time while delivering maximum personal style impact.
    • Customizable for all hair textures from straight to coily with strategic texturizing.

    Cutting your hair short buys you back time every single morning: faster washes, less product, and a freshness through summer that long hair never quite manages. For a lot of women it’s also just satisfying, a clean break from the idea that hair has to be long to count. But the cut only pays off if it suits your face, your texture, and how much upkeep you’re genuinely willing to do, because some short styles need a salon visit every month and others coast for ten weeks.

    The styles worth considering

    The modern pixie is longer on top, shorter at the sides, with piecey layers you can push in a few directions. It’s a world away from the close-cropped pixies of the past, and you can sweep the top to one side for an asymmetric, dramatic look. The catch is maintenance: it needs a trim every four to six weeks, and a pixie that grows out unattended loses its shape fast. Budget for that before you commit.

    The textured bob hits at the jawline and uses internal layers and point-cutting for movement. It’s the most universally flattering short cut on this list, because it frames the face without exposing the neck and ears, which some people would rather keep covered. It also suits every hair type.

    The French bob sits just below the ears, shorter than a standard bob but longer than a pixie, and almost always comes with blunt, eye-grazing bangs. It has an editorial, distinctly European quality and looks especially good on straight or slightly wavy hair.

    The curly crop sits close to the head and lets the curl pattern lead. The whole thing depends on finding a stylist who cuts curly hair dry, so the shape is built around how your curls actually fall rather than how they behave soaking wet.

    If you’re between short and long, there’s a hybrid worth knowing: the bixie, a pixie-bob cross that keeps cropped volume at the crown and wispy, face-framing length around the ears. It’s a forgiving middle ground and a good pick for thick hair you want to lighten.

    • Pixie cuts do best on fine-to-medium hair with a little wave
    • Textured bobs suit basically every type and face
    • French bobs want straight-to-wavy hair for the blunt effect
    • Curly crops need a curl specialist

    Styling and upkeep at a glance

    Style Morning routine Products Trim frequency
    Modern pixie 2 min: wax and tousle Styling wax, light spray 4-6 weeks
    Textured bob 5 min: air-dry or quick diffuse Sea salt spray, light cream 6-8 weeks
    French bob 5 min: flat-iron bangs, tousle Heat protectant, smoothing serum 6 weeks
    Curly crop 3 min: scrunch cream, air-dry Curl cream, gel, microfiber towel 8-10 weeks
    Bixie 3-5 min: matte paste, piece out Matte pomade or paste 6-8 weeks

    For a short cut with texture, the styling itself is quick but has a rhythm. Rough-dry towel-dried hair with a dab of light styling cream, tousling against the scalp with your hands on medium heat. Lift the roots at the crown and aim the airflow in the direction your cut wants to sit. Add a few random bends with a mini straightener or a one-inch iron. Then finish with a pea-sized amount of matte paste emulsified between your palms, pieced through the ends around your ears and temples. That’s the whole thing.

    A note for anyone with fine hair leaning toward a bob: a blunt, razor-clean perimeter just below the chin reads as denser than a layered version, because all the ends land on one line. Our fine hair guide goes into that trick in more depth.

    Before you book

    Save ten to fifteen reference photos, and pay real attention to the hair texture in each one, not just the shape. A cut that looks incredible on pin-straight hair behaves completely differently on thick waves. Show your stylist the photos and ask for an honest read on which of them will actually work with your natural texture rather than fighting it.

    Going short is one of the more freeing things you can do with your hair. Pick a style that excites you, find a stylist you trust, and enjoy having less to fuss with and more room to see your own face. If you like the idea of short but want it rougher and more lived-in, our modern shag guide covers a shorter shag that hits that note.

    Frequently Asked Questions

    How do I know if a short haircut will look good on me?

    Use the famous 2.25-inch rule: place a pencil horizontally under your chin and hold a ruler vertically under your earlobe. If the distance from ear to pencil is less than 2.25 inches, short hair is mathematically harmonious for your jawline.

    Does short hair require more salon visits?

    Yes. Because short hair grows noticeably against facial features, maintenance trims every 5 to 7 weeks are necessary to keep the neckline and perimeter crisp.

    Can thick or coarse hair work with a short bob?

    Yes! Your stylist should incorporate interior weight removal techniques (like undercut panels or channel cutting) to prevent the cut from expanding into an unflattering triangle.

    What products are non-negotiable for short hair?

    A matte texturizing spray, a lightweight styling paste, and a mini flat iron are the three most essential tools for styling modern short haircuts.

    Additional Details

    • Description: Thinking about going short? From pixie cuts to textured bobs, these 4 short hairstyles prove that cutting your hair can be the most liberating decision you make.
    • Published: 2026-05-11T00:00:00.000Z
    • Updated: 2026-09-07T00:00:00.000Z

    Images

    • (none listed)