Blog

  • Capsule Wardrobe Guide: Essential Checklist & Styling Tips

    Capsule Wardrobe Guide: Essential Checklist & Styling Tips

    📌 At a Glance (Key Takeaways)

    • A capsule wardrobe curates 25 to 35 high-quality, interchangeable pieces to produce 70+ distinct outfits.
    • Eliminates decision fatigue, shopping impulsivity, and morning wardrobe overwhelm.
    • Focuses on cohesive neutral color palettes (cream, navy, camel, black) with premium natural fabrics.
    • The 3-3-3 rule and 70/30 core-to-accent ratio ensure maximum outfit versatility.

    How can a closet be completely full and still offer nothing to wear? Almost everyone has stood there, and the answer usually isn’t that you need more clothes — it’s that the ones you own don’t talk to each other. A capsule wardrobe fixes that. It’s a smaller, deliberate set of pieces, roughly 25 to 35, chosen in a shared color palette so nearly everything combines with everything else. Fewer decisions, more outfits, and no more staring at a full rail feeling stuck.

    The math is a little absurd when you look at it: most of us wear about 20% of our wardrobe 80% of the time. A capsule just makes that 20% the whole closet.

    Start with fifteen

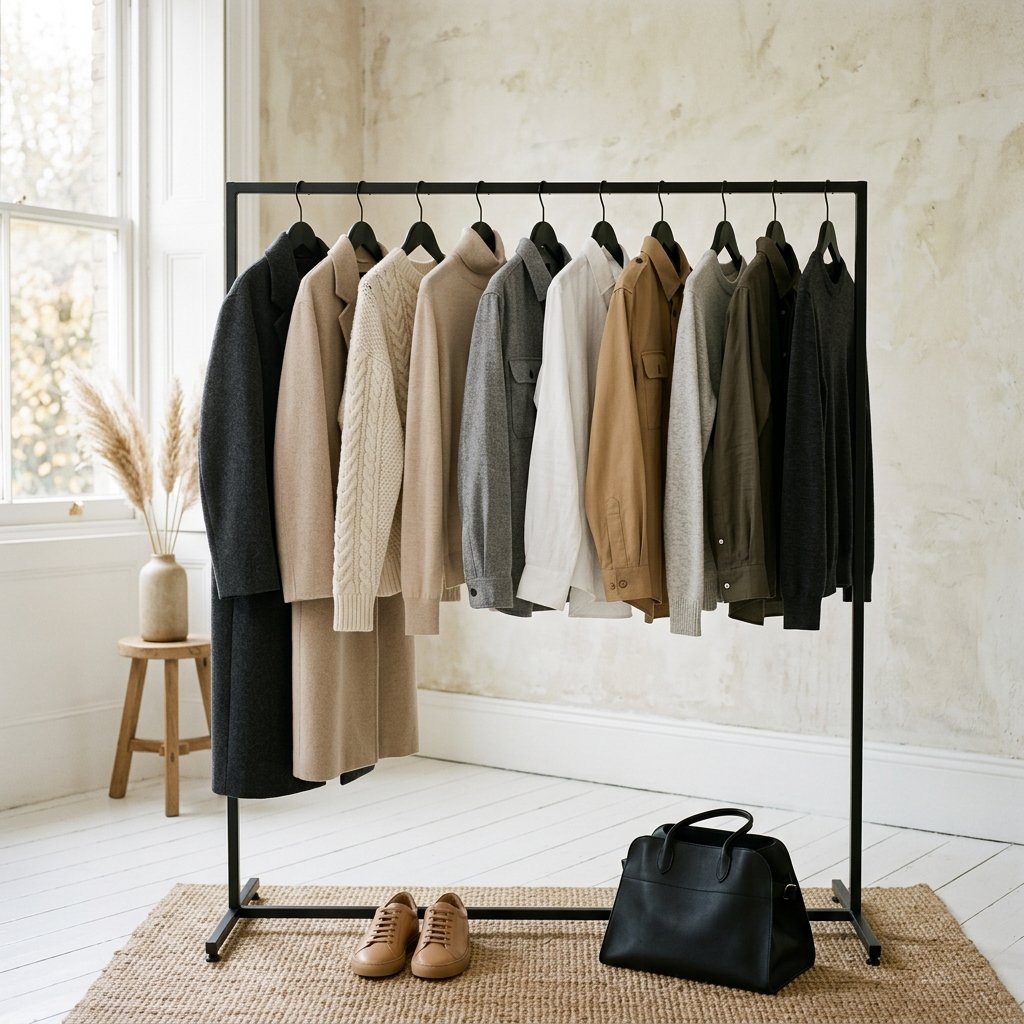
    You don’t have to build the whole thing at once. A tight starter set in neutrals — black, white, cream, navy, camel — plus one accent color like olive or burgundy will already dress you for most of your life:

    1. A thick, opaque white crewneck tee
    2. An oversized black or tan blazer
    3. Straight-leg mid-wash jeans, no distressing
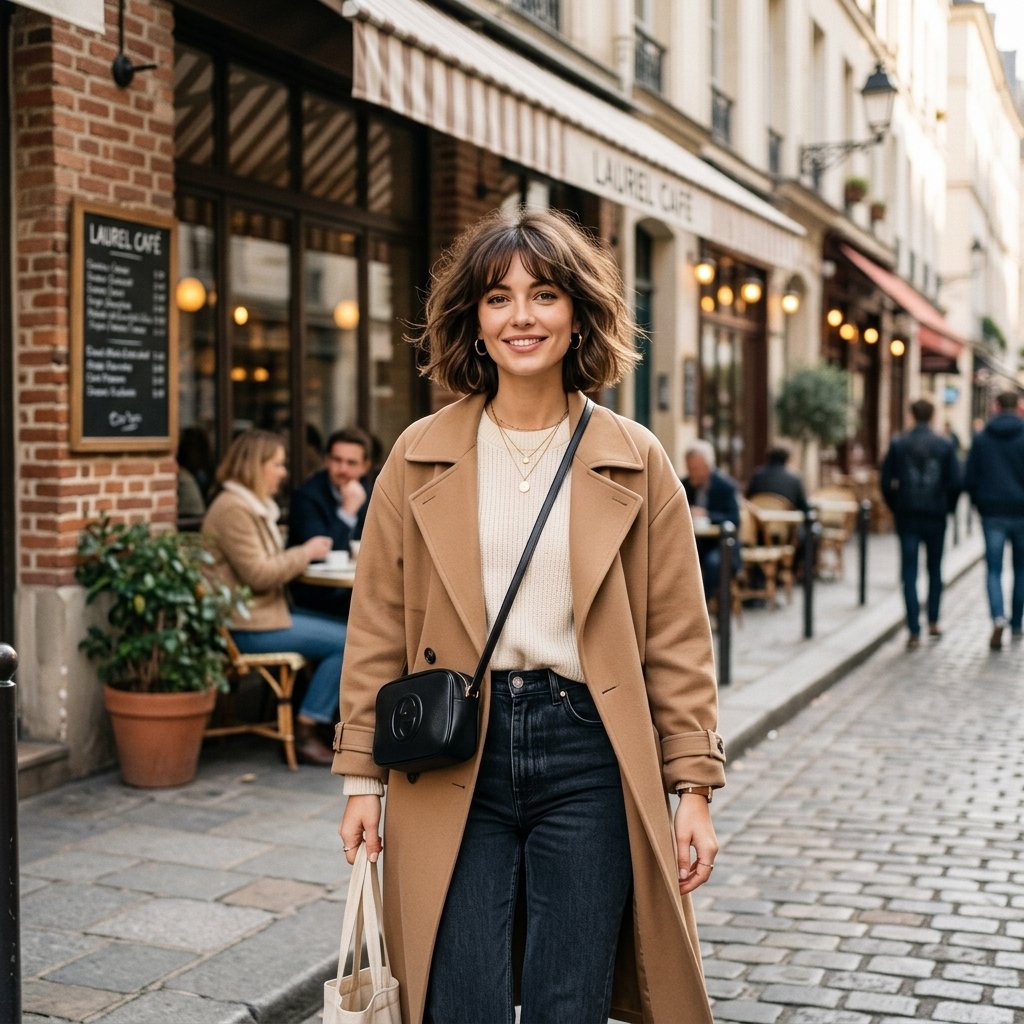
    4. A camel double-breasted trench
    5. A white or ivory silk button-down
    6. A black-and-white striped knit
    7. High-waisted black tailored trousers
    8. A simple little black dress
    9. A structured leather tote big enough for a laptop
    10. Clean, unbranded white leather sneakers
    11. Black leather loafers
    12. A chunky neutral cardigan
    13. Gold hoop earrings
    14. A relaxed vintage-wash denim jacket
    15. Pointed-toe ankle boots in black or dark brown

    From fifteen pieces you can already run a week of distinct outfits. A few reliable formulas:

    • Everyday: white tee + straight jeans + oversized blazer + white sneakers
    • Office: silk button-down + tailored trousers + loafers + trench
    • Evening: little black dress + blazer + ankle boots

    Growing to thirty

    When you’re ready to expand, a balanced year-round capsule tends to settle around thirty pieces. This isn’t a shopping list to complete in a weekend — add as you replace things that wear out.

    Tops and layers: two white crewneck tees, a black tank or bodysuit, an oversized poplin shirt, a cashmere or merino crewneck, a Breton striped long-sleeve, a tailored blazer, a cardigan with horn buttons, a denim trucker, and a silk blouse.

    Bottoms and dresses: high-rise straight jeans, clean black ankle jeans, wide-leg tailored trousers, a satin slip skirt, a cotton utility midi skirt, tailored linen shorts, a little black dress, and a ribbed knit column dress.

    Outerwear: a trench, a wool overcoat, a lightweight puffer, and a leather moto jacket.

    Shoes: white sneakers, pointed loafers, block-heel sandals, Chelsea boots, and ballet flats.

    Accessories: a structured leather tote, a crossbody for weekends, and a good leather belt.

    The color rule that makes it work

    If you want any top to go with any bottom, keep the palette roughly 70/30. About 70% of the wardrobe should be three neutrals that already coordinate — say cream, black, and camel — and the remaining 30% two accent colors that suit your skin, like forest green or burgundy. Build on the neutral base and the accents slot in wherever you want them.

    Here’s how a few core pieces stretch across occasions:

    Piece Casual Office Evening
    White button-down Open over a tank, jeans, sneakers Tucked into wide-leg trousers, loafers Half-tucked into a silk skirt, heels
    Tailored blazer Over a tee, denim, cap Over a knit, matching trousers Over a slip dress, ankle boots
    Slip midi skirt Graphic tee, denim jacket, sneakers Cashmere sweater, belt, loafers Silk cami, blazer, boots

    Buy slowly, buy well

    The temptation is to order everything on the list at once. Resist it. Natural fibers — wool, silk, linen, good cotton — cost more up front but survive the washing and wearing that shreds cheaper blends, and they’re the difference between a capsule that lasts years and one you rebuild every season. Prioritize fit over quantity, and don’t hesitate to take pieces to a tailor; a small alteration is often what turns “fine” into “expensive-looking.”

    Clearing the decks

    If you’re starting from an overstuffed closet, a proper purge comes first. Pull everything out and pile it on the bed — the closet needs to be empty so you’re deciding what earns its way back in, not what to remove. Sort into four honest piles: keep, maybe, donate or sell, and recycle. Box up the “maybe” pile and set a reminder for a month out; whatever you didn’t reach for, let go.

    The last filter is the most useful. For anything in the keep pile, try to picture three separate outfits using other things you already own. If you can’t get to three, it probably doesn’t belong in a capsule — it’s a piece that only works alone, and those are exactly what clog a closet.

    For styling within the palette, our Monochromatic Outfits Guide is a natural next read, and when the seasons turn, Summer-to-Fall Outfits shows how to stretch these pieces across the transition.

    Frequently Asked Questions

    How much does it cost to build a capsule wardrobe from scratch?

    You do not need to buy an entire wardrobe at once. Most women already own 60% of the essentials. Start by cataloging what you have, then invest in 2 to 3 high-impact missing pieces (like a tailored blazer or premium leather boots) per season.

    Does a capsule wardrobe get boring after a few months?

    Quite the opposite. When garments fit impeccably and coordinate seamlessly, you spend less time frustrated in front of the mirror. Adding statement scarves, bold jewelry, or seasonal accent shoes provides endless variety.

    How do you handle seasonal changes with a capsule wardrobe?

    Maintain a core 25-piece all-season base (jeans, white shirts, tees, blazers) and rotate a small 5-to-8 piece seasonal capsule twice a year (summer linens and sandals versus winter wools and boots).

    What fabrics should I look for when shopping for capsule pieces?

    Prioritize natural fibers: 100% organic cotton, merino wool, cashmere, linen, and silk. These fibers breathe, regulate body temperature, drape flatteringly, and last for years compared to synthetic polyester.

    Additional Details

    • Description: Simplify your morning routine and elevate your style with a 15-piece capsule wardrobe that creates over 50 unique outfit formulas.
    • Published: 2026-05-06T00:00:00.000Z
    • Updated: 2026-09-07T00:00:00.000Z

    Images

    • (none listed)
  • Monochromatic Outfits: How to Style Single-Color Looks

    Monochromatic Outfits: How to Style Single-Color Looks

    📌 At a Glance (Key Takeaways)

    • Monochrome dressing creates an uninterrupted vertical line that elongates the body silhouette.
    • Mixing contrasting fabric textures (wool, silk, leather, knit) is the secret to avoiding flat outfits.
    • Varying shades, tones, and saturations within a single color family adds high-fashion depth.
    • Neutral monochrome (all-cream, all-camel, all-navy) conveys effortless quiet luxury.

    A woman crosses the street in head-to-toe camel — a cashmere sweater, wide wool trousers, a coat a shade darker, boots a shade darker still — and somehow the whole thing reads as more expensive than the sum of its parts. Nothing is loud. There’s no print, no clash, no obvious effort. That’s monochromatic dressing working exactly as intended: one color family, top to bottom, creating a long unbroken line that quietly flatters and never tries too hard.

    The reason it works is simple. When there’s no horizontal break at your waist or hips, the eye travels straight down and reads you as taller and more streamlined. The reason it sometimes doesn’t work is just as simple, and it comes down to two things: texture and tone.

    Don’t wear one flat shade

    The trap is matching. If you put a smooth cotton sweater with smooth cotton trousers in the identical shade of beige, the outfit goes flat and a little uniform-like. The fix is friction — combine surfaces that catch light differently.

    Pair a chunky cable knit with a fluid silk slip skirt. Put a stiff leather trench over a soft cashmere layer. Set matte against shine, rough against smooth, structured against fluid. Once two or three textures are in play, a single color stops looking like a costume and starts looking deliberate.

    And don’t match your tones exactly

    Monochrome doesn’t mean one dye lot. It looks far richer when you range across the family — an all-cream look built from ecru, oatmeal, ivory, and warm alabaster has depth that a single flat cream never will. Same principle for every palette: pick a lane, then wander within it.

    Define your shape

    Without color to mark where your top ends and your bottom begins, a monochrome look can swallow your frame. A few small moves keep it sharp:

    • Tuck. A front tuck or full tuck re-establishes the waist.
    • Belt. A thin belt in a slightly darker tone of the same color breaks the block cleanly without introducing contrast.
    • Play proportion. Fitted top with wide trousers, or an oversized knit with something slim underneath.

    Then let your accessories carry the interest. When everything is one color, a gold chain, a polished buckle, or a good bag clasp becomes the focal point — so choose them with a little more care than usual.

    Here’s how a few palettes tend to shake out:

    Palette Textures to combine Best season Mood
    Cream / ivory Chunky knit + satin + suede Fall / winter Soft, luxe
    Navy Wool blazer + poplin + dark denim Year-round Sleek, sharp
    Camel / cognac Cashmere + leather + wool coat Autumn Warm, editorial
    Black Sheer + tailored wool + patent Evening Edgy, slimming
    Olive Utility jacket + silk + corduroy Spring / fall Earthy

    A cream outfit that won’t wash you out

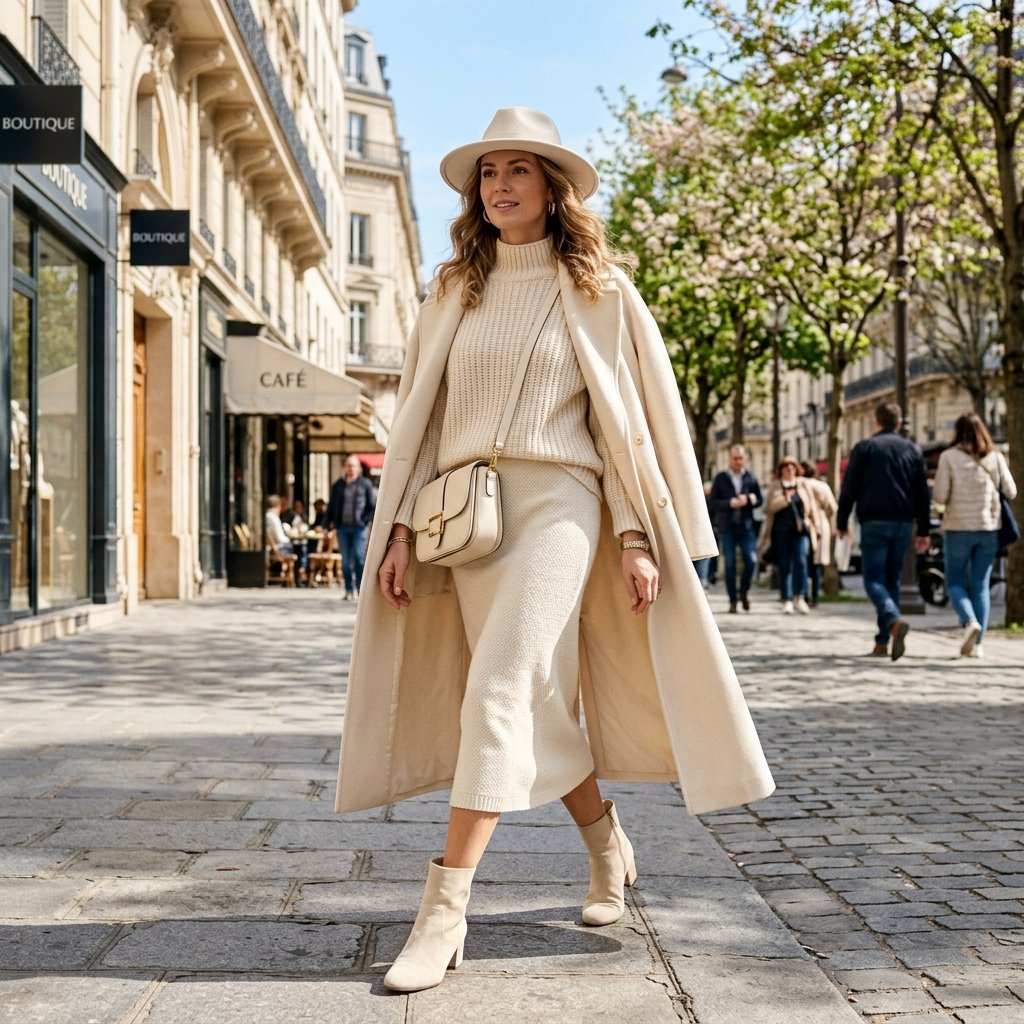
    The one palette people fear is all-cream, because it can drain color from your face. Built in layers, it doesn’t have to. Start with an ivory ribbed turtleneck or a fine cashmere crewneck, add high-waisted wool trousers in warm ecru, and throw an oatmeal or camel coat over your shoulders. Break the waist with a textured cream leather belt and a gold buckle, and finish with pointed almond boots peeking out from the hem. The tonal shifts and the metal keep it from going pale and shapeless.

    If you’re just starting

    Begin with black — it’s the most forgiving monochrome there is, and mixing matte cotton, a bit of patent leather, and silk gives you all the texture play without any tonal risk. Once that feels natural, move to grey, navy, or cream. It’s one of the most dependable formulas we know for mornings when you want to look pulled together and have no energy to think about it.

    For the foundation pieces behind these looks, see our Capsule Wardrobe Guide, and for tonal dressing at work, Office Outfit Ideas.

    Frequently Asked Questions

    Can plus-size women wear all-white or all-cream monochrome?

    Absolutely! Monochromatic cream creates an uninterrupted vertical line that is exceptionally flattering and elongating on all body types. Choose structured, opaque fabrics like tailored wool and heavyweight cotton that drape cleanly.

    How do I choose the right monochromatic color for my skin tone?

    Cool undertones look striking in crisp white, navy, charcoal, and ice blue. Warm undertones shine in camel, espresso, warm ivory, and olive green.

    Do shoes and bags have to match the monochromatic outfit?

    Not necessarily. Matching your shoes to your trousers extends the vertical leg line, but introducing an intentional contrasting neutral shoe (like black pointed boots with all-cream) adds modern architectural interest.

    What is the easiest monochromatic color to start with?

    All-navy or all-black is the easiest entry point because most women already own jeans, sweaters, and blazers in these shades. Once comfortable, transition into all-camel or all-cream.

    Additional Details

    • Description: Master the art of wearing one color from head to toe. Learn how to mix textures and play with proportions for a sleek, cohesive look.
    • Published: 2026-05-01T00:00:00.000Z
    • Updated: 2026-09-07T00:00:00.000Z

    Images

    • (none listed)
  • Elevated Athleisure: How to Style Activewear for Everyday

    📌 At a Glance (Key Takeaways)

    • Elevated athleisure blends performance activewear with structured tailoring and chic accessories.
    • The ‘one-piece rule’ balances sporty items (leggings, biker shorts) with formal pieces (blazers, trench coats).
    • Monochrome activewear sets create an instantly cohesive, intentional foundation.
    • High-end leather bags, clean sneakers, and gold jewelry transform gym wear into street style.

    Start with the leggings you already own, then add one structured thing. That’s the entire move that turns activewear into an outfit you can wear to lunch: a long tan trench over a black set, a tailored blazer with bike shorts and a white tee, a leather bomber over sweatpants. Stylists call it the “third piece” — your leggings are one, your top is two, and the third is whatever brings structure and says the look was on purpose.

    Do only that and you’ve cleared the bar. Everything else here is about doing it well.

    Where the line is

    Leggings and trainers stopped being gym-only a while ago, and that’s genuinely useful — a lot of days now run from a workout to errands to a coffee meeting without a wardrobe change in between. But there’s a real difference between looking like you didn’t bother to change and looking deliberately put-together in athletic pieces. The whole thing hinges on contrast: soft, flexible athletic fabric against something sharp and tailored.

    The balance to aim for

    The reliable ratio is roughly half and half. Don’t wear head-to-toe activewear unless you’re actually going to the gym; pair it with structured lifestyle pieces instead.

    • Leggings and a sports bra → add an oversized blazer and pointed loafers.
    • Bike shorts and a tank → add a long trench and sleek sunglasses.
    • Athletic joggers → add a crisp poplin shirt and gold hoops.

    Choosing pieces that actually style up

    Not all activewear cooperates. A few things make it far easier to work with:

    Matte, opaque fabric. Shiny thin spandex looks cheap and shows everything. Thick, matte, four-way-stretch compression fabric holds its shape and reads more like a real garment.

    Neutral color. Black, charcoal, olive, and navy style up far more easily than neon or busy prints. A matching tonal set — an espresso or forest-green bra and legging — looks intentional on its own and makes a clean base for a coat.

    A high rise. More flattering, and it looks polished under a cropped top.

    Shoes and accessories do the talking

    This is where an outfit tips from gym to street. Reach for clean lifestyle sneakers — Sambas, New Balance, plain leather trainers — rather than scuffed running shoes. A little jewelry goes a long way: gold hoops, a watch, a thin necklace all signal the look was considered rather than thrown on. And swap the gym duffel for a leather crossbody or a structured belt bag worn across the chest.

    Base Layer Shoes Accessory
    Black high-waist leggings Camel overcoat + white tee Retro court sneakers Leather crossbody
    Ribbed bike shorts Oversized linen button-down Chunky dad sneakers Canvas tote + gold hoops
    Pleated tennis skirt Cashmere crewneck White tennis shoes Cap + shoulder bag
    Wide-leg track pants Fitted high-neck bodysuit Platform sneakers Rectangle sunglasses

    The off-duty formula

    If you want one look to lean on, this is it, and it works especially well for travel. Matching black compression leggings and a high-neck tank as your base. An oversized boyfriend-fit blazer — houndstooth or plain black wool — thrown over your shoulders. White ribbed crew socks bunched slightly at the ankle, with clean retro sneakers. Then the finishing details: chunky gold hoops, acetate sunglasses, a structured leather tote. It’s as comfortable as it looks and reads as an outfit, not gym leftovers.

    For more everyday combinations, our Casual Outfit Ideas guide has plenty, and Summer-to-Fall Outfits covers how to carry these layers into cooler weather.

    Keeping it looking new

    Athletic fabrics and knits both punish careless washing, so a couple of habits pay off. Steam wool blazers and knits rather than pressing them flat — a hot iron can flatten the fibers and leave a shine. Wash compression pieces and knitwear inside out in cold water on a gentle cycle, which protects the stretch and stops colors bleeding. Fold heavy knits rather than hanging them, or the shoulders stretch into little bumps. And once a month, run a fabric shaver over the friction spots on wool and cashmere to keep them looking crisp. None of it takes long, and it’s the difference between pieces that last a season and pieces that last years.

    Frequently Asked Questions

    Can you wear athleisure to a casual office?

    Yes, if styled carefully. Pair high-quality matte black leggings with a crisp poplin button-down shirt, a structured blazer that covers the hips, and polished leather loafers.

    What are the best sneakers for elevated athleisure?

    Retro leather court sneakers (like Adidas Sambas, New Balance 550s, or Veja Campos) are far more stylish for street wear than bulky technical running shoes.

    How do you style biker shorts without looking underdressed?

    Layer biker shorts under an oversized button-down shirt worn open over a ribbed tank, or wear them with an oversized blazer that hits mid-thigh.

    How do you wash activewear so it maintains its color and compression?

    Wash inside out in cold water on a delicate cycle using gentle detergent. Never use fabric softeners (which coat moisture-wicking fibers) and always air-dry.

    Additional Details

    • Description: Learn the stylist secrets to dressing up leggings and sneakers so you look polished and put-together while remaining comfortable.
    • Published: 2026-04-26T00:00:00.000Z
    • Updated: 2026-09-07T00:00:00.000Z

    Images

    • (none listed)
  • Summer-to-Fall Outfits: Transitional Layering Guide

    Summer-to-Fall Outfits: Transitional Layering Guide

    📌 At a Glance (Key Takeaways)

    • Transitional dressing pairs warm-weather silhouettes (slip dresses, shorts) with autumnal textures (knitwear, leather).
    • Embrace transitional color palettes: olive, burgundy, rust, and espresso layered over summer whites.
    • The ‘third piece rule’ adds structured jackets, cardigans, or trench coats to regulate variable temperatures.
    • Swapping open sandals for closed leather loafers or ankle boots instantly shifts the seasonal aesthetic.

    The hardest stretch of the year to dress for isn’t deep winter or high summer — it’s the six weeks between them. Late August through mid-October gives you a 55-degree morning, a 78-degree afternoon, and a chilly walk home after dark, all in the same outfit. A winter coat is too much; a sundress and sandals feel behind the season. The answer isn’t a whole new wardrobe. It’s layering, and a few swaps that let your summer clothes keep earning their place a while longer.

    The knit-over-dress trick

    Don’t pack away your lightweight summer midi dresses yet. Pull a chunky crewneck or mock-neck sweater over one and the dress becomes a skirt. To keep it from looking bulky, cinch a thin belt at your waist and fold the sweater’s hem up over it — you get a cropped, tucked look that defines your shape instead of hiding it.

    Mix your seasons on purpose

    One of the better-looking transitional moves is deliberately combining a summer fabric with an autumn one. White linen trousers with a soft long-sleeve knit and leather slides, for instance — the contrast between the crisp linen and the cozy knit is the whole point, and it reads as intentional rather than confused. Fabric-mixing like this is what makes the in-between window fun instead of frustrating.

    Let the shoes carry the shift

    Sometimes changing nothing but your footwear moves an outfit from July to October. Trade strappy sandals for closed-toe loafers or ankle boots and a summery floral dress suddenly leans fall, especially with a denim jacket over it. It’s the lowest-effort swap on this list and often the most effective.

    Reach for a shacket

    A shacket — an overshirt heavy enough to work as light outerwear — is the transitional layer. In a wool blend or thick corduroy, it goes over a tank and jeans, and if the afternoon heats up you just tie it around your waist. That flexibility is exactly what this weather demands.

    Play with proportion

    Denim shorts don’t have to disappear in September. Pair them with a long-sleeve tee, a structured blazer, and ankle boots — the leggy-bottom, tailored-top contrast is a street-style staple and stretches your summer shorts into cooler weeks.

    A few formulas to build on

    If you’d rather start from set combinations, these hold up:

    • Slip dress + chunky knit + suede ankle boots — the Parisian version of the knit-over-dress trick, belted at the waist.
    • Denim shorts + oversized blazer + loafers — worn with sheer ankle socks, a clean high-low look.
    • Poplin shirt + light trench + ballet flats — a striped button-down with straight jeans under a cotton or faux-leather trench.
    • Linen trousers + fine cashmere cardigan — keep the breathable trousers, swap the tank for a cardigan worn as a shirt, in camel or chocolate.

    To match the layer to the actual forecast:

    Morning Midday Base Outer layer Shoes
    50–55°F 70–75°F Silk slip skirt + tee Oversized wool blazer Closed-toe loafers
    55–60°F 75–80°F Denim shorts + tank Lightweight trench Retro sneakers
    60–65°F 68–72°F Wide-leg trousers + knit Draped cardigan or scarf Pointed ankle boots

    Shift the colors before the weather does

    Layering is half of it; color is the other half. Start slipping autumn tones into summer shapes — an olive or chocolate tank under your denim jacket instead of white, say. It nods to the season even while the thermometer still reads summer, and it’s a subtler signal than swapping your whole palette overnight.

    If you want the fastest possible “autumnize any outfit” shortcuts, there are really only three: change to closed-toe shoes, trade pastels and coral for espresso, hunter green, and burgundy, and introduce a tactile fabric — suede, corduroy, ribbed knit, leather — over your smooth summer cottons.

    For the foundation pieces that carry across both seasons, see our Capsule Wardrobe Guide, and if you’re updating your look top to bottom, Fall Nail Colors covers the seasonal palette.

    One care note as the knits come out

    Transitional dressing pulls a lot of wool and cashmere back into rotation, so it’s worth a reminder: steam these rather than ironing them flat, fold heavy knits instead of hanging them so the shoulders don’t stretch, and store them with a little cedar to keep moths off. A quick pass with a fabric shaver on the friction points keeps last year’s sweaters looking like this year’s.

    Frequently Asked Questions

    Can you wear white jeans after Labor Day?

    Yes, completely! The outdated ‘no white after Labor Day’ rule has been discarded by modern fashion. Style white denim for fall by pairing it with warm camel cashmere, espresso leather boots, and wool blazers.

    What is the best jacket for 65-degree weather?

    A double-breasted cotton gabardine trench coat or an unlined wool-blend oversized blazer is ideal. They block chilly breezes without causing overheating under midday sun.

    How do you wear linen pants in September without looking like you’re at the beach?

    Pair your linen pants with heavier autumn textures: a chunky ribbed knit sweater, a leather belt, and closed-toe leather loafers instead of sandals and linen shirts.

    What are the best transitional bags?

    Swap woven straw and raffia beach totes for rich suede shoulder bags or structured leather crossbodies in chocolate brown or olive.

    Additional Details

    • Description: Don’t pack away your summer dresses just yet. Discover 5 simple layering tricks to transition your wardrobe seamlessly into autumn.
    • Published: 2026-04-21T00:00:00.000Z
    • Updated: 2026-09-07T00:00:00.000Z

    Images

    • (none listed)
  • Daily Sunscreen Guide: Why SPF Is Your Best Anti-Aging Step

    Daily Sunscreen Guide: Why SPF Is Your Best Anti-Aging Step

    📌 At a Glance (Key Takeaways)

    • Up to 80% to 90% of visible skin aging (photoaging) is caused by daily cumulative UVA/UVB exposure.
    • UVA rays penetrate glass windows and clouds year-round, degrading collagen and elastin.
    • Apply the two-finger rule (approx. 1/4 teaspoon for the face) to achieve the stated SPF rating on the bottle.
    • Mineral (zinc oxide/titanium dioxide) and chemical filters offer targeted benefits for sensitive vs. active skin.

    If your routine has one step you never skip, make it sunscreen. Not the serum you spent too much on, not the ten-step evening ritual, sunscreen. It does more to keep skin looking young than anything else you can buy, and most people either wear too little of it or save it for beach days.

    Here’s the part that reframes everything: the majority of what we think of as “aging skin,” the lines, the sagging, the brown spots, comes from sun exposure rather than birthdays. Dermatologists call it photoaging. So a good SPF isn’t just protection against sunburn, it’s the closest thing skincare has to an anti-aging product that actually works.

    Two kinds of rays, two kinds of damage

    Ultraviolet light reaches your skin in two wavelengths worth knowing about.

    UVB is the burning kind. It hits the surface, causes sunburn, and is strongest in summer. It doesn’t pass through glass, which is why you don’t tan sitting by a closed window.

    UVA is the aging kind. It has a longer wavelength that sinks deeper into the skin, breaking down the collagen and elastin that keep your face firm, and it drives a lot of pigmentation. Unlike UVB, it’s steady all year, it goes through clouds, and it goes through window glass. That’s the reason “it’s overcast” and “I’m just indoors today” aren’t reasons to skip it.

    The word to look for on a label is broad-spectrum, which means the formula covers both. Aim for SPF 30 to 50.

    How much, and how often

    The single biggest reason sunscreen underperforms is that people use a fraction of what the tested SPF assumes. A simple fix is the two-finger rule: squeeze sunscreen along the full length of your index and middle fingers, and that’s roughly the amount for your face and neck.

    A few habits make the difference:

    • Apply it last in your morning skincare, after moisturizer, and give it a few minutes to set before makeup.
    • Reapply every couple of hours when you’re outdoors, swimming, or sweating. A powder or mist SPF makes midday reapplication over makeup realistic.
    • Take it down your neck and onto the backs of your hands, which are usually the first places to show age and the first places people forget.

    Mineral or chemical?

    Both types work. They just get there differently, and one may suit your skin better than the other.

    Type Common filters Strengths Trade-offs
    Mineral (physical) Zinc oxide, titanium dioxide Gentle, good for sensitive or reactive skin, works the moment it’s on Can leave a white cast, feels a touch heavier
    Chemical Avobenzone, octisalate, and others Sheer, light, sits easily under makeup Needs about 15 minutes to absorb, can sting near the eyes

    Mineral formulas sit on top of the skin and are the safer bet if you’re prone to irritation or rosacea. Chemical formulas absorb in and tend to feel more invisible, which many people prefer for everyday wear. Modern mineral sunscreens have also gotten much better at avoiding that chalky cast, and tinted mineral versions with iron oxides work beautifully on deeper skin tones without leaving a gray film.

    Matching it to your skin

    Oily skin does best with an oil-free, gel, or fluid formula that dries down matte. Dry skin is happier with a creamier sunscreen that includes hydrators like hyaluronic acid or glycerin. Sensitive skin generally tolerates mineral formulas best, since they’re less likely to react. If you’ve never liked how sunscreen feels, the odds are good you were using the wrong texture for your skin rather than the wrong product entirely.

    The best sunscreen, in the end, is the one you’ll actually put on every morning. Find a texture you don’t mind, keep it by your toothbrush so you remember, and wear it whether or not you’re going outside.

    At night, that SPF needs to come off properly, and a splash of water won’t cut it, so our Double Cleansing Method Guide walks through removing it. If you’re still building the rest of your routine around it, start with our Beginner Skincare Routine.

    Frequently Asked Questions

    Do I really need to wear sunscreen if I work indoors all day?

    Yes. Standard window glass in offices and homes blocks UVB rays (preventing sunburn), but allows up to 75% of UVA aging rays to penetrate directly through, degrading collagen while you sit at your desk.

    Does the SPF in my foundation or BB cream provide enough protection?

    No. You would have to apply 7 to 10 times the normal amount of foundation to achieve the SPF 30 rating on the bottle, which would look cakey and unnatural. Always apply a dedicated standalone sunscreen underneath makeup.

    What is the difference between SPF 30 and SPF 50?

    SPF 30 filters out approximately 97% of UVB rays, while SPF 50 filters out 98%. While the percentage difference appears small, SPF 50 allows half as many photons to penetrate your skin over cumulative hours.

    Why does sunscreen sometimes pill when I apply makeup?

    Pilling occurs when incompatible ingredients clash (e.g., silicone-heavy sunscreens over water-based moisturizers). Allow your moisturizer to absorb for 3 minutes before SPF, and let SPF set for 5 minutes before makeup.

    Additional Details

    • Description: Fine lines, hyperpigmentation, and loss of elasticity are heavily accelerated by UV light. Learn why SPF is a non-negotiable beauty step.
    • Published: 2026-04-16T00:00:00.000Z
    • Updated: 2026-09-07T00:00:00.000Z

    Images

    • (none listed)
  • Double Cleansing Method: Benefits and How-To for Clear Skin

    📌 At a Glance (Key Takeaways)

    • Double cleansing uses an oil-based cleanser followed by a water-based cleanser for complete purification.
    • The chemical principle ‘like dissolves like’ dissolves waterproof SPF, sebum, and pollutants effortlessly.
    • Significantly reduces clogged pores, blackheads, and hormonal acne breakouts without stripping skin.
    • Essential evening ritual for anyone wearing daily sunscreen, long-wear foundation, or living in urban areas.

    Putting oil on oily skin sounds like exactly the wrong move. It isn’t. Oil is what finally shifts the stuff a regular face wash leaves behind, and for anyone who wears sunscreen or makeup, that leftover film is often the real reason pores clog.

    That’s the whole logic behind double cleansing, the two-step method that came out of Korean and Japanese routines: an oil-based cleanser first, then a water-based one. The first step handles everything oily and water-resistant. The second handles everything else.

    Why one wash leaves stuff behind

    Your skin collects two different kinds of grime over a day. There’s the water-soluble layer, which is sweat, dust, and loose dead cells, and there’s the oil-soluble layer, which is sunscreen, makeup, and your own oxidized sebum. A standard foaming or gel cleanser is good at the first group and close to useless on the second. Sunscreen and long-wear makeup are built to survive water, so a water-based wash simply slides over them.

    Oil cleansers work on the old chemistry rule that like dissolves like. The oil loosens the sunscreen, makeup, and hardened sebum sitting in your pores, and once you add water it emulsifies into a milky layer that rinses clean away. Then the second cleanser takes care of the sweat and grime underneath.

    How to do it

    This is an evening routine. You don’t need to double cleanse in the morning, when there’s no makeup or SPF to remove.

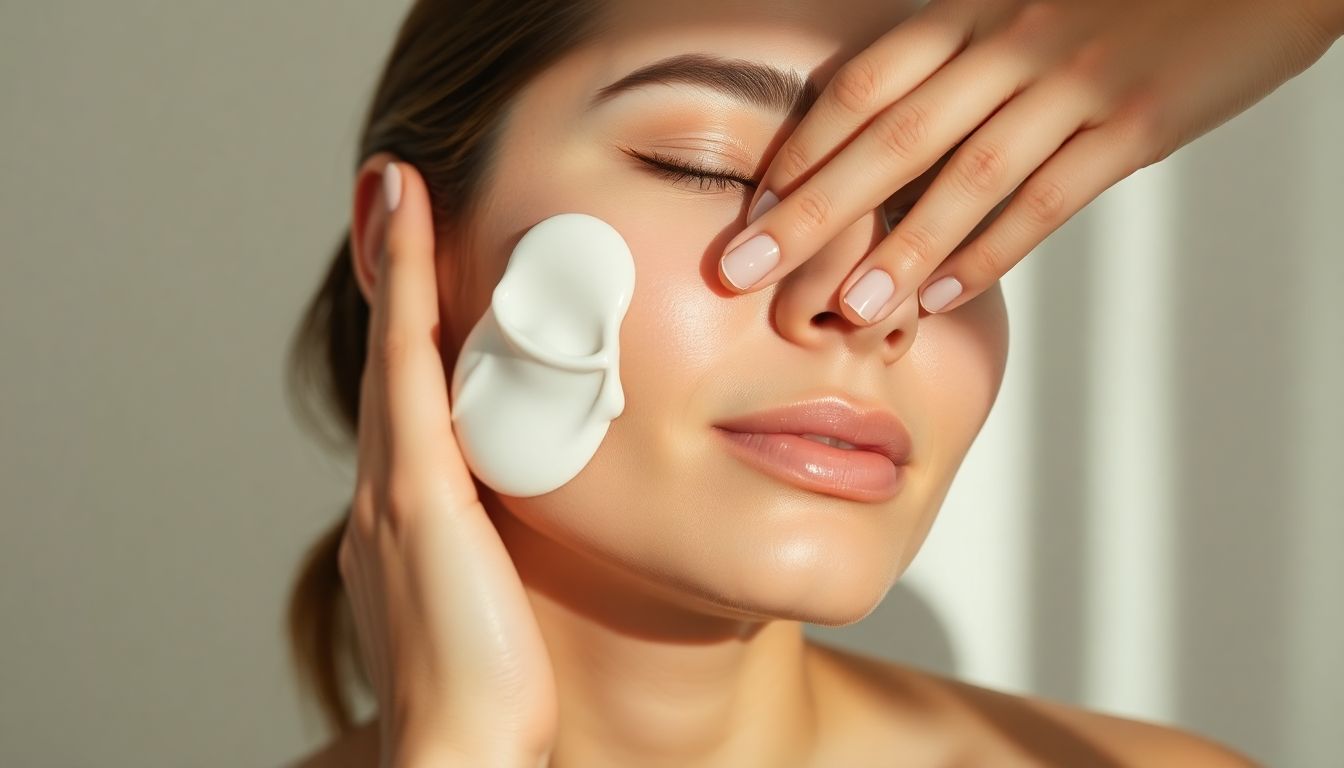
    1. Start on completely dry skin and dry hands. Warm one to two pumps of cleansing oil, or a scoop of balm, between your fingers and massage it over your face for a full minute. Give a little extra attention to your nose and chin, where blackheads gather.
    2. Wet your hands and keep massaging. The oil turns milky as it emulsifies. Rinse with lukewarm water.
    3. While your skin is still damp, work in a gentle water-based gel or cream cleanser, then rinse again.
    4. Pat dry with a clean towel and move straight into your serum and moisturizer.

    A quick note on matching the oil cleanser to your skin: lightweight cleansing oils suit oily and acne-prone skin, richer balms work better on dry or mature skin, and fragrance-free options with squalane or centella are the safer pick if you’re sensitive or prone to redness.

    The mistakes worth avoiding

    Three things trip people up. The first is wetting the skin before the oil cleanser, which activates the emulsifiers too early and stops the oil from doing its job, so keep everything bone-dry to start. The second is rushing, since it genuinely takes close to a minute for the oil to break down a dense layer of sunscreen. The third is reaching for kitchen oils like coconut or olive oil. Those aren’t formulated to emulsify, so they never fully rinse off and leave a film that can make breakouts worse. Stick with a proper cosmetic cleansing oil or balm.

    If your skin ever feels tight or squeaky after cleansing, that’s a sign your second cleanser is too harsh, not that you need to wash harder. Double cleansing should leave skin clean and comfortable, never stripped.

    Once your skin is clean, don’t leave it bare. Follow with hydration, and if you wore SPF that day, this is the routine that properly removes it. For the daytime half of the equation, see our Daily Sunscreen Guide, and to lock in moisture afterward, our Hyaluronic Acid Guide covers the next step.

    Frequently Asked Questions

    Will cleansing with oil cause breakouts if I have oily, acne-prone skin?

    No, quite the opposite! Formulated cleansing oils bind to excess sebum and hardened plugs inside pores, gently dissolving them away without stripping your protective moisture barrier.

    Do I need to double cleanse in the morning as well?

    No. Double cleansing is an evening ritual to remove daily SPF, makeup, and pollution. In the morning, a simple splash of water or a single gentle water-based wash is sufficient.

    Can I use micellar water instead of a cleansing oil?

    Micellar water works in a pinch, but cotton pad friction can irritate sensitive skin over time, and it does not dissolve deep sebum plugs as effectively as an emulsifying cleansing oil.

    What water temperature is best for rinsing?

    Always use lukewarm water. Hot water strips vital epidermal lipids and triggers rosacea flare-ups, while cold water prevents oil cleansers from emulsifying properly.

    Additional Details

    • Description: If you wear makeup or daily sunscreen, standard washing isn’t enough. Learn how double cleansing melts away impurities to prevent breakouts.
    • Published: 2026-04-11T00:00:00.000Z
    • Updated: 2026-09-07T00:00:00.000Z

    Images

    • (none listed)
  • No-Makeup Makeup Look: 10-Minute Natural Routine

    No-Makeup Makeup Look: 10-Minute Natural Routine

    📌 At a Glance (Key Takeaways)

    • Focuses on skin preparation, translucent spot-concealing, and natural dewy radiance.
    • Replaces heavy full-coverage foundations with hydrating skin tints and tinted serum drops.
    • Cream and liquid blush formulations melt into the skin, mimicking a natural flushed glow.
    • Feathered brows and tightlined brown mascara subtly frame the face without looking heavy.

    You’ve got ten minutes before you need to leave, you slept badly, and you don’t want to look like you slept badly. This is the exact situation the no-makeup makeup look was made for. The goal isn’t a bare face, it’s a face that reads as fresh, awake, and healthy, with all the work hidden.

    The trick most people miss is that this look is mostly skincare. A natural finish depends on well-prepped, hydrated skin far more than on any single product. If you skip that part, no amount of clever concealing will make skin look genuinely fresh.

    Start with the skin

    Before anything with pigment touches your face, get the base right. Cleanse with something gentle, press in a hydrating serum, and follow with a moisturizer. Finish with a sunscreen that leaves a slight sheen rather than a matte flatness, and give it a few minutes to settle so your makeup doesn’t slide or pill.

    Conceal only where you need it

    The instinct to coat the whole face in foundation is what makes “natural” makeup look like a mask. Instead, reach for a sheer skin tint or just spot-conceal. A little creamy concealer at the inner corners of the eyes wakes up the whole face, a touch around the nostrils calms redness, and a dot on any blemish covers it without burying the surrounding skin. Blend with a fingertip or a damp sponge; the warmth of your fingers melts the product in so it looks like skin rather than sitting on top.

    Lean on cream textures

    Powders are the enemy of a dewy, skin-like finish, since they can read dry and cakey in daylight. Cream formulas blend into the skin and keep that lit look.

    • Cream blush: tap a rosy or peachy shade onto the apples of your cheeks and blend up toward your temples.
    • Cream or balm highlighter: a little on the cheekbones, brow bone, and bridge of the nose, blended until you can’t see where it starts.

    Finish softly

    A few small touches pull it together. Brush your brows up and out with a clear gel for a fuller, groomed shape. Curl your lashes and add one coat of brown mascara, which looks softer than a hard black. Finish with a tinted lip oil or balm in a shade close to your natural lip color.

    The whole thing should take about ten minutes. Keep the textures creamy, keep the coverage light and targeted, and you’ll walk out looking like a well-rested version of yourself rather than someone wearing a full face.

    For the wardrobe half of an effortless morning, see our Casual Outfit Ideas, and if you want a slightly more luminous version of this same idea, our Natural Glow Makeup guide takes it a step further.

    Frequently Asked Questions

    Can you do a no-makeup makeup look if you have active acne or rosacea?

    Yes! Use a color-correcting green primer on red areas, apply a lightweight skin tint all over, and then use a high-pigment, pinpoint concealer directly on blemishes with a tiny detail brush, blending only the edges.

    Why does my no-makeup makeup look disappear by midday?

    Lightweight cream products require a fine-mist makeup setting spray formulated with flexible polymers to lock the glow in place without adding heavy powder weight.

    Is brown mascara really better than black mascara for a natural look?

    Yes, especially for fair, light, and medium complexions. Brown mascara defines and lengthens lashes without the harsh graphic contrast that immediately signals makeup wear.

    What is the best way to choose a skin tint shade?

    Swatch the tint along your jawline in natural daylight. Because skin tints are sheer and flexible, one shade usually spans 2 to 3 skin tones easily.

    Additional Details

    • Description: Perfect the ‘clean girl’ aesthetic with our quick, 10-minute natural makeup routine that enhances your features without feeling heavy.
    • Published: 2026-04-06T00:00:00.000Z
    • Updated: 2026-09-07T00:00:00.000Z

    Images

    • (none listed)
  • How to Use Hyaluronic Acid for Plump, Hydrated Skin

    📌 At a Glance (Key Takeaways)

    • Hyaluronic acid is a humectant capable of binding up to 1,000 times its molecular weight in water.
    • Must always be applied to damp skin; applying to dry skin can pull moisture out of the dermis.
    • Must be sealed immediately with an occlusive moisturizer to lock hydration in place.
    • Multi-molecular weight formulations hydrate both the surface epidermis and deeper skin layers.

    Apply your hyaluronic acid to damp skin, then seal it right away with a moisturizer. That one sentence is most of what you need to know, and it’s the step people get wrong more than any other. Done properly, hyaluronic acid plumps and softens. Done on a dry face in dry air, the same serum can leave your skin more parched than before you started.

    Hyaluronic acid, usually shortened to HA, is a molecule your skin already makes. It works like a sponge, holding a remarkable amount of water, and that’s why it turns up in nearly every serum and moisturizer on the shelf. Our natural supply of it drops as we age, which is part of why skin gradually loses that firm, cushioned quality.

    The damp-skin rule, and why it matters

    HA is a humectant, which means it pulls in water from whatever’s nearby. On damp skin, or in humid air, that’s great: it draws moisture in and holds it there, and your skin looks plumper for it.

    The problem shows up in dry conditions. When the air is dry, say, winter, or an air-conditioned office, and you apply HA to a completely dry face, there’s no moisture at the surface for it to grab. So it reaches deeper and pulls water up from the lower layers of your skin, where it then evaporates into the dry air. You end up drier than before. This is why the “apply to damp skin” instruction isn’t a nice-to-have; it’s the difference between the product working and backfiring.

    So: cleanse, and while your face is still damp, or after a light mist of water or toner, press the serum in.

    Lock it in

    Because HA holds water at the surface, that water will drift off into the air unless you trap it. Within a minute of patting in your serum, follow with a moisturizer, ideally one with occlusive or barrier ingredients like squalane, ceramides, or plant oils. That layer acts as a lid, keeping the hydration where you want it.

    What “molecular weight” means on the label

    You’ll see HA described in different ways on packaging, and the terms come down to molecule size:

    • High molecular weight sits on the surface and forms a smoothing film, for an instant plumping effect.
    • Low molecular weight is smaller and settles into the upper layers for longer-lasting hydration.
    • Many good serums blend several weights so they hydrate at more than one level. You may also see “sodium hyaluronate,” which is a stable, easily absorbed form of the same thing.

    You don’t need to memorize the science. A serum that combines a few weights is a safe, effective choice.

    Where it fits in your routine

    The general rule is thinnest to thickest. After cleansing and any toner, apply your HA to damp skin, follow with other water-based serums if you use them, and finish with moisturizer, plus sunscreen in the morning. Use it that way and it does exactly what it promises: soft, plump, hydrated skin.

    For the daytime steps that follow it, see our Daily Sunscreen Guide, and to see how HA fits into a full evening routine, our Morning vs. Night Skincare Routine lays out the order.

    Frequently Asked Questions

    Can I use hyaluronic acid every day?

    Yes! Hyaluronic acid is non-irritating and can be safely used twice daily, both morning and night, across all skin types (including sensitive and acne-prone skin).

    Can hyaluronic acid be combined with retinol or vitamin C?

    Yes, it pairs harmoniously with virtually all active ingredients. Layer hyaluronic acid before or after retinol to buffer irritation, or apply it after your morning vitamin C serum.

    What should I do if my skin feels tight after applying hyaluronic acid?

    This is a sign you applied it to dry skin or failed to seal it with an adequate moisturizer. Always apply to damp skin and follow immediately with a rich cream.

    Is sodium hyaluronate the same as hyaluronic acid?

    Sodium hyaluronate is the salt form of hyaluronic acid. It has a smaller molecular size, resists oxidation better, and penetrates the skin more easily than pure hyaluronic acid.

    Additional Details

    • Description: Hyaluronic acid is a hydration powerhouse, but applying it wrong can actually dry out your skin. Learn the rules for maximum hydration.
    • Published: 2026-04-01T00:00:00.000Z
    • Updated: 2026-09-07T00:00:00.000Z

    Images

    • (none listed)
  • Summer Nail Ideas: Bright Colors & Chic Designs for 2026

    Summer Nail Ideas: Bright Colors & Chic Designs for 2026

    📌 At a Glance (Key Takeaways)

    • Summer manicures highlight vibrant dopamine shades: butter yellow, vibrant cobalt, citrus lime, and coral.
    • Chrome powder finishes and jelly translucent textures mimic sun-drenched water and glistening glass.
    • Fruit nail art (cherries, lemons) and wavy abstract swirl lines provide playful vacation accents.
    • SPF protection for hands prevents gel polish discoloration and solar photoaging.

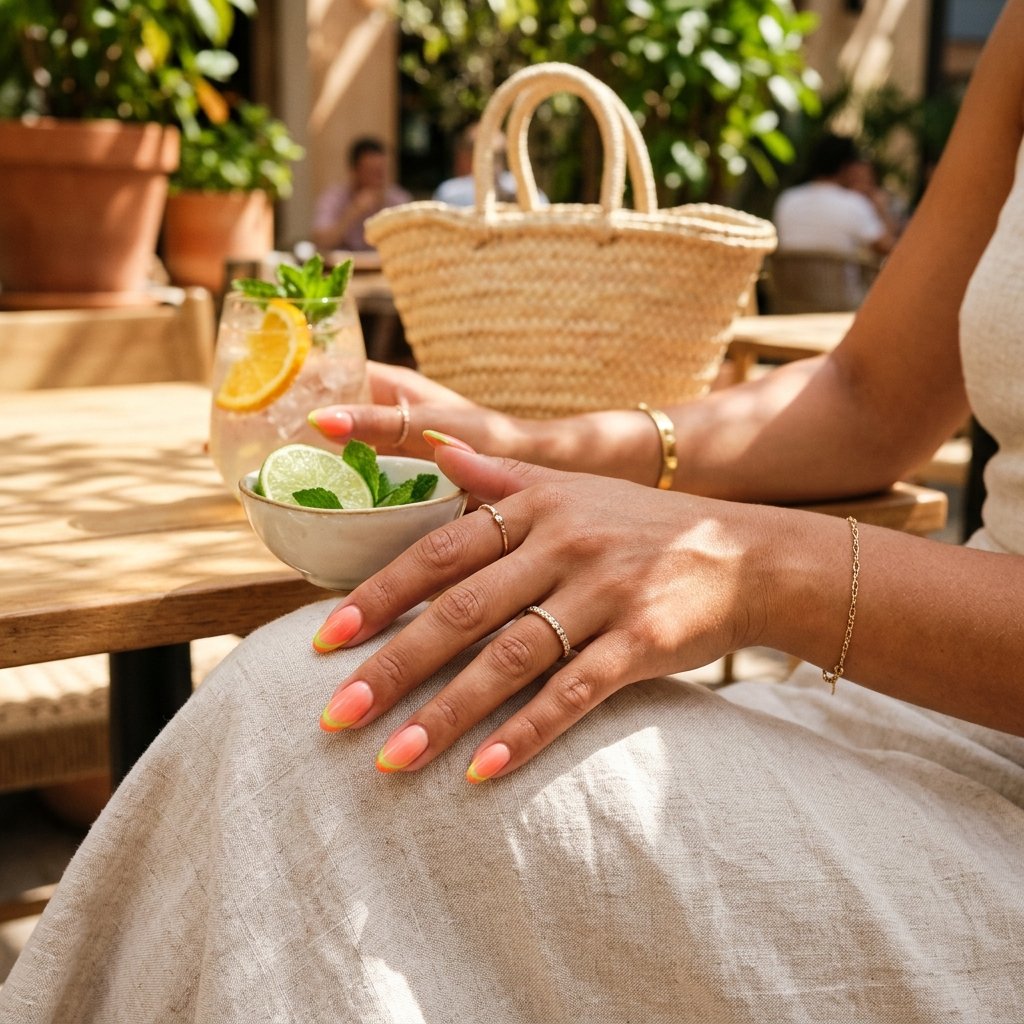
    Something about the first heatwave makes a neutral manicure feel like a waste. Longer days, bare feet, a cold drink sweating on the table, and suddenly you want color on your hands. Summer is the one season where nail art gets to be loud and no one blinks, so this is the time to try the juicy jelly, the electric blue, the tiny painted fruit you’d never risk in February.

    Colors and looks worth trying

    Butter yellow. Yellow is a summer classic, but this year’s version is soft and creamy rather than harsh neon. It’s a milky pastel, sometimes with a fine dusting of white chrome, and it looks clean and expensive against a tan. Genuinely flattering on most skin tones because it mimics golden-hour light. If you try one thing on this list, make it this.

    Jelly nails. Translucent, glassy tints in watermelon, mango, lime, or a bright “Aperol” orange. The trick is the see-through finish, which lets a little of your natural nail show through so the color reads juicy and lightweight instead of heavy. Best on medium almond nails with a very glossy top coat.

    Mediterranean cobalt. A vivid, electric royal blue, the color of Santorini domes and deep water. It’s striking as a bold French micro-tip or an abstract negative-space swirl rather than a full flood of color.

    Painted fruit accents. Tiny cherries, lemons, or strawberries hand-painted on a milky sheer base. The cherry French, two little cherries near the cuticle or tip on an accent nail, has real staying power. Use a dotting tool for the fruit and a fine brush for the stems.

    Pearlescent seashell chrome. Iridescent pearl powder buffed over a pale blush or oyster base, like the inside of a shell. Soft and pretty, and perfect for beach weddings or a coastal evening.

    Here’s a quick way to match a look to where you’re headed:

    Look Holds up in sun/chlorine Length Best setting
    Butter yellow High, resists yellowing Any City walks, brunch
    Cobalt French High Medium almond Beach resort
    Juicy jelly Moderate, refresh top coat Short–medium Tropical trips
    Seashell chrome High, sealed Medium oval Coastal evenings
    Fruit art High Short squoval Festivals, picnics

    Making it survive the pool

    Chlorine, saltwater, and sunscreen are hard on a manicure. They fade color, dull the top coat, and can lift the edges. A little defense goes a long way.

    Before a beach or pool trip, add an extra layer of no-wipe gel top coat over your manicure to build a non-porous shield. Watch your sunscreen: chemical formulas and bug sprays contain solvents that melt polish and yellow it, so switch to a zinc-oxide mineral sunscreen around your nails, or at least wash your hands after applying. And rinse with fresh water as soon as you’re out of the ocean or pool, since salt and pool chemicals dry out the cuticles and dull the finish fast. If you’re wearing regular air-dry polish rather than gel, a fresh coat of top coat every few days keeps the color from chipping in the heat.

    One more small thing that makes a bright manicure look intentional rather than accidental: tidy cuticles. Bright color draws the eye straight to the nail, so a quick push-back and a drop of oil does as much for the overall look as the polish itself.

    Style your summer nails alongside our Hot Weather Outfits guide, and if you’d rather keep things minimal, Short Nail Designs shows how these colors read on shorter nails.

    Frequently Asked Questions

    Why does my summer nail polish turn yellow in the sun?

    UV radiation from intense sunlight can oxidize polish pigments, and sunscreen chemicals (like avobenzone) can react with gel top coats. Using a top coat with UV inhibitors prevents discoloration.

    What is the most chip-resistant nail option for a 2-week beach vacation?

    Builder in a Bottle (BIAB) or hard gel overlays are the most resilient against saltwater, sand friction, and pool chlorine, lasting 2 to 3 weeks without chipping.

    Can I pull off bright butter yellow on fair skin?

    Yes! Choose a soft pastel butter yellow with creamy undertones rather than an electric neon yellow, which creates a harmonious, sunny contrast against fair skin.

    How do I keep my cuticles hydrated while traveling in the summer?

    Carry a pocket-sized cuticle oil pen filled with jojoba and vitamin E. Apply it twice daily, especially after sun exposure and swimming.

    Additional Details

    • Description: From coral ombres to citrus-inspired French tips, these summer nail designs are dominating Pinterest boards everywhere. Here are the 5 looks worth bookmarking before your next salon visit.
    • Published: 2026-03-27T00:00:00.000Z
    • Updated: 2026-09-07T00:00:00.000Z

    Images

    • (none listed)
  • Easy Claw Clip Hairstyles: 5 Effortless Looks for Any Hair

    📌 At a Glance (Key Takeaways)

    • Claw clips distribute tension evenly, preventing scalp strain and hair tie breakage.
    • Versatile across all hair textures from silky straight to coily 4C patterns.
    • Provides rapid, heat-free styling suitable for formal work, casual errands, and gym sessions.
    • Pairing clips with wispy face-framing strands softens jawline angles and flatters bone structure.

    If your hair ties keep leaving you with a dented ponytail and a low-grade headache by afternoon, the problem isn’t your hair, it’s the elastic. A thin band forces all its tension onto one narrow ring of strands, which is exactly where mid-shaft breakage and those tell-tale creases come from. A claw clip spreads that same grip across a wide set of teeth, so it holds without the snapping or the tension headache. That’s the real reason the clip came back and stayed, beyond just looking very 90s.

    Whatever your day looks like, the office, weekend errands, or reviving day-three hair, the right clip turns loose strands into something that looks intentional in under a minute. Here are five that cover most hair lengths.

    Five styles worth knowing

    The French twist fold. Gather everything into a low ponytail at the nape, twist the base tight until the twist stands up against the back of your head, fold the length back down, and clamp a large clip over the middle of the fold. Pull two wispy pieces loose along your cheekbones. Polished, professional, endlessly Parisian. Best on medium to long hair.

    The spilled waterfall half-up. Section off the top half from temple to temple, twist it up once, and clamp a medium rectangular clip against your crown. Let the tail spill back over the top of the clip like a little fountain while the rest flows free. Playful and full, and it works on short, shoulder-length, and long hair.

    The lazy chignon. Gather a low ponytail at the nape, fold the hair up once, tuck the loose ends under the loop, and clamp a matte clip horizontally across the fold. Sleek, minimal, and boardroom-appropriate. Medium to long hair.

    The high cascade ponytail. For height and drama without a tight hair tie, gather at the crown, twist the base up, and clamp a large curved clip underneath so the tail props up and cascades over it. High-energy and casual. Best on long hair.

    The double-twist bun. For thick or textured hair, split the back into two vertical sections, twist them around each other into a rope, coil it into a flat bun, and clamp a jumbo double-tooth clip across the center. This one actually holds heavy hair all day.

    Pick the right clip

    Most slipping and most scalp aches come down to the wrong size clip for your hair, not bad technique.

    Hair type Clip size Shape Hold
    Fine / short Small (2-2.5 in) Curved arc High grip
    Medium / shoulder Medium (3-3.5 in) Rectangular Versatile
    Thick / coarse / long Jumbo (4-5 in) Double-tooth XL Maximum
    Curly / textured Wide-mouth (4 in) Open-cage Flexible

    Material matters more than people assume. Cellulose acetate, made from wood pulp and cotton fibers, flexes slightly to accommodate your hair’s volume and resists shattering, which makes it the kindest option for delicate strands. Molded acrylic is cheap and rigid, fine for lightweight everyday use but prone to cracking if it hits the bathroom tile. Metal alloy clips hold the most and suit very thick or heavy hair; just look for lightweight aluminum or hollow designs so they don’t drag on your scalp.

    When clips won’t stay put

    Fine, clean, or silky hair tends to shed a clip within the hour. Three fixes, in order of how much they help:

    1. Add grip first. Mist your roots and mid-lengths with dry texturizing spray or dry shampoo before you twist. The micro-powder creates friction so the teeth have something to bite.
    2. Hide an elastic under it. Tie a small clear elastic around the gathered section, then clamp the clip directly over the knot. The teeth interlock with the band and it holds for hours.
    3. Build a ledge. Cross two bobby pins in an X against your scalp where you want the clip to sit, then hook the bottom teeth of the clip just under the pins.

    That last trick is the one stylists use on the slipperiest hair, and it’s close to foolproof. For more one-minute morning looks, our 5-minute hairstyles piece leans heavily on the claw clip, and if you want texture to give the clip more to hold, heatless curls are a good place to start the night before.

    Frequently Asked Questions

    Are claw clips better for hair health than regular elastics?

    Yes, significantly. Claw clips do not crimp, pinch, or snap the hair cuticle, greatly reducing tension alopecia and mechanical breakage.

    Can I wear claw clips with short hair or a bob?

    Yes! Use mini or small 2-inch claw clips for half-up styles, which secure shorter top layers while leaving the bob perimeter free.

    What is the most durable material for claw clips?

    Cellulose acetate and metal alloy clips are far more durable and shatter-resistant than cheap brittle acrylic plastics.

    How do you style a claw clip for a formal event?

    Slick back the roots with styling gel or hair oil, create a pristine center part, twist hair into a clean French twist, and use a sleek tortoiseshell or gold metal clip.

    Additional Details

    • Description: From casual half-ups to the classic chic twist, master 5 quick claw-clip hairstyles that take less than two minutes.
    • Published: 2026-03-22T00:00:00.000Z
    • Updated: 2026-09-07T00:00:00.000Z

    Images

    • (none listed)